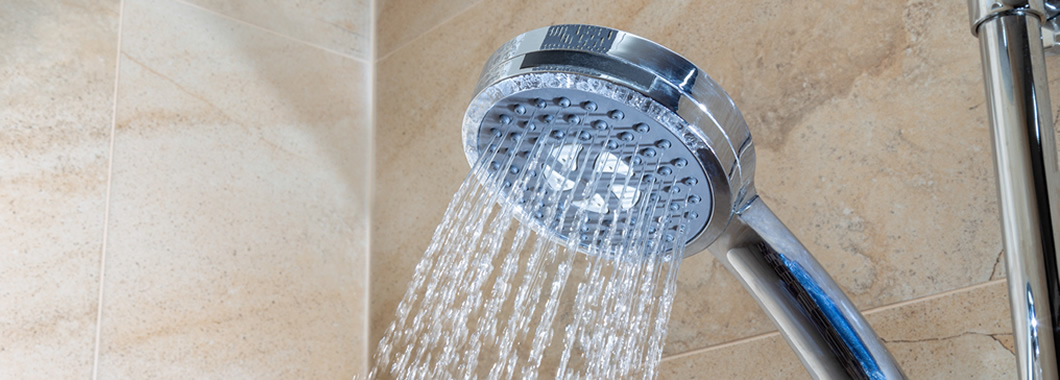
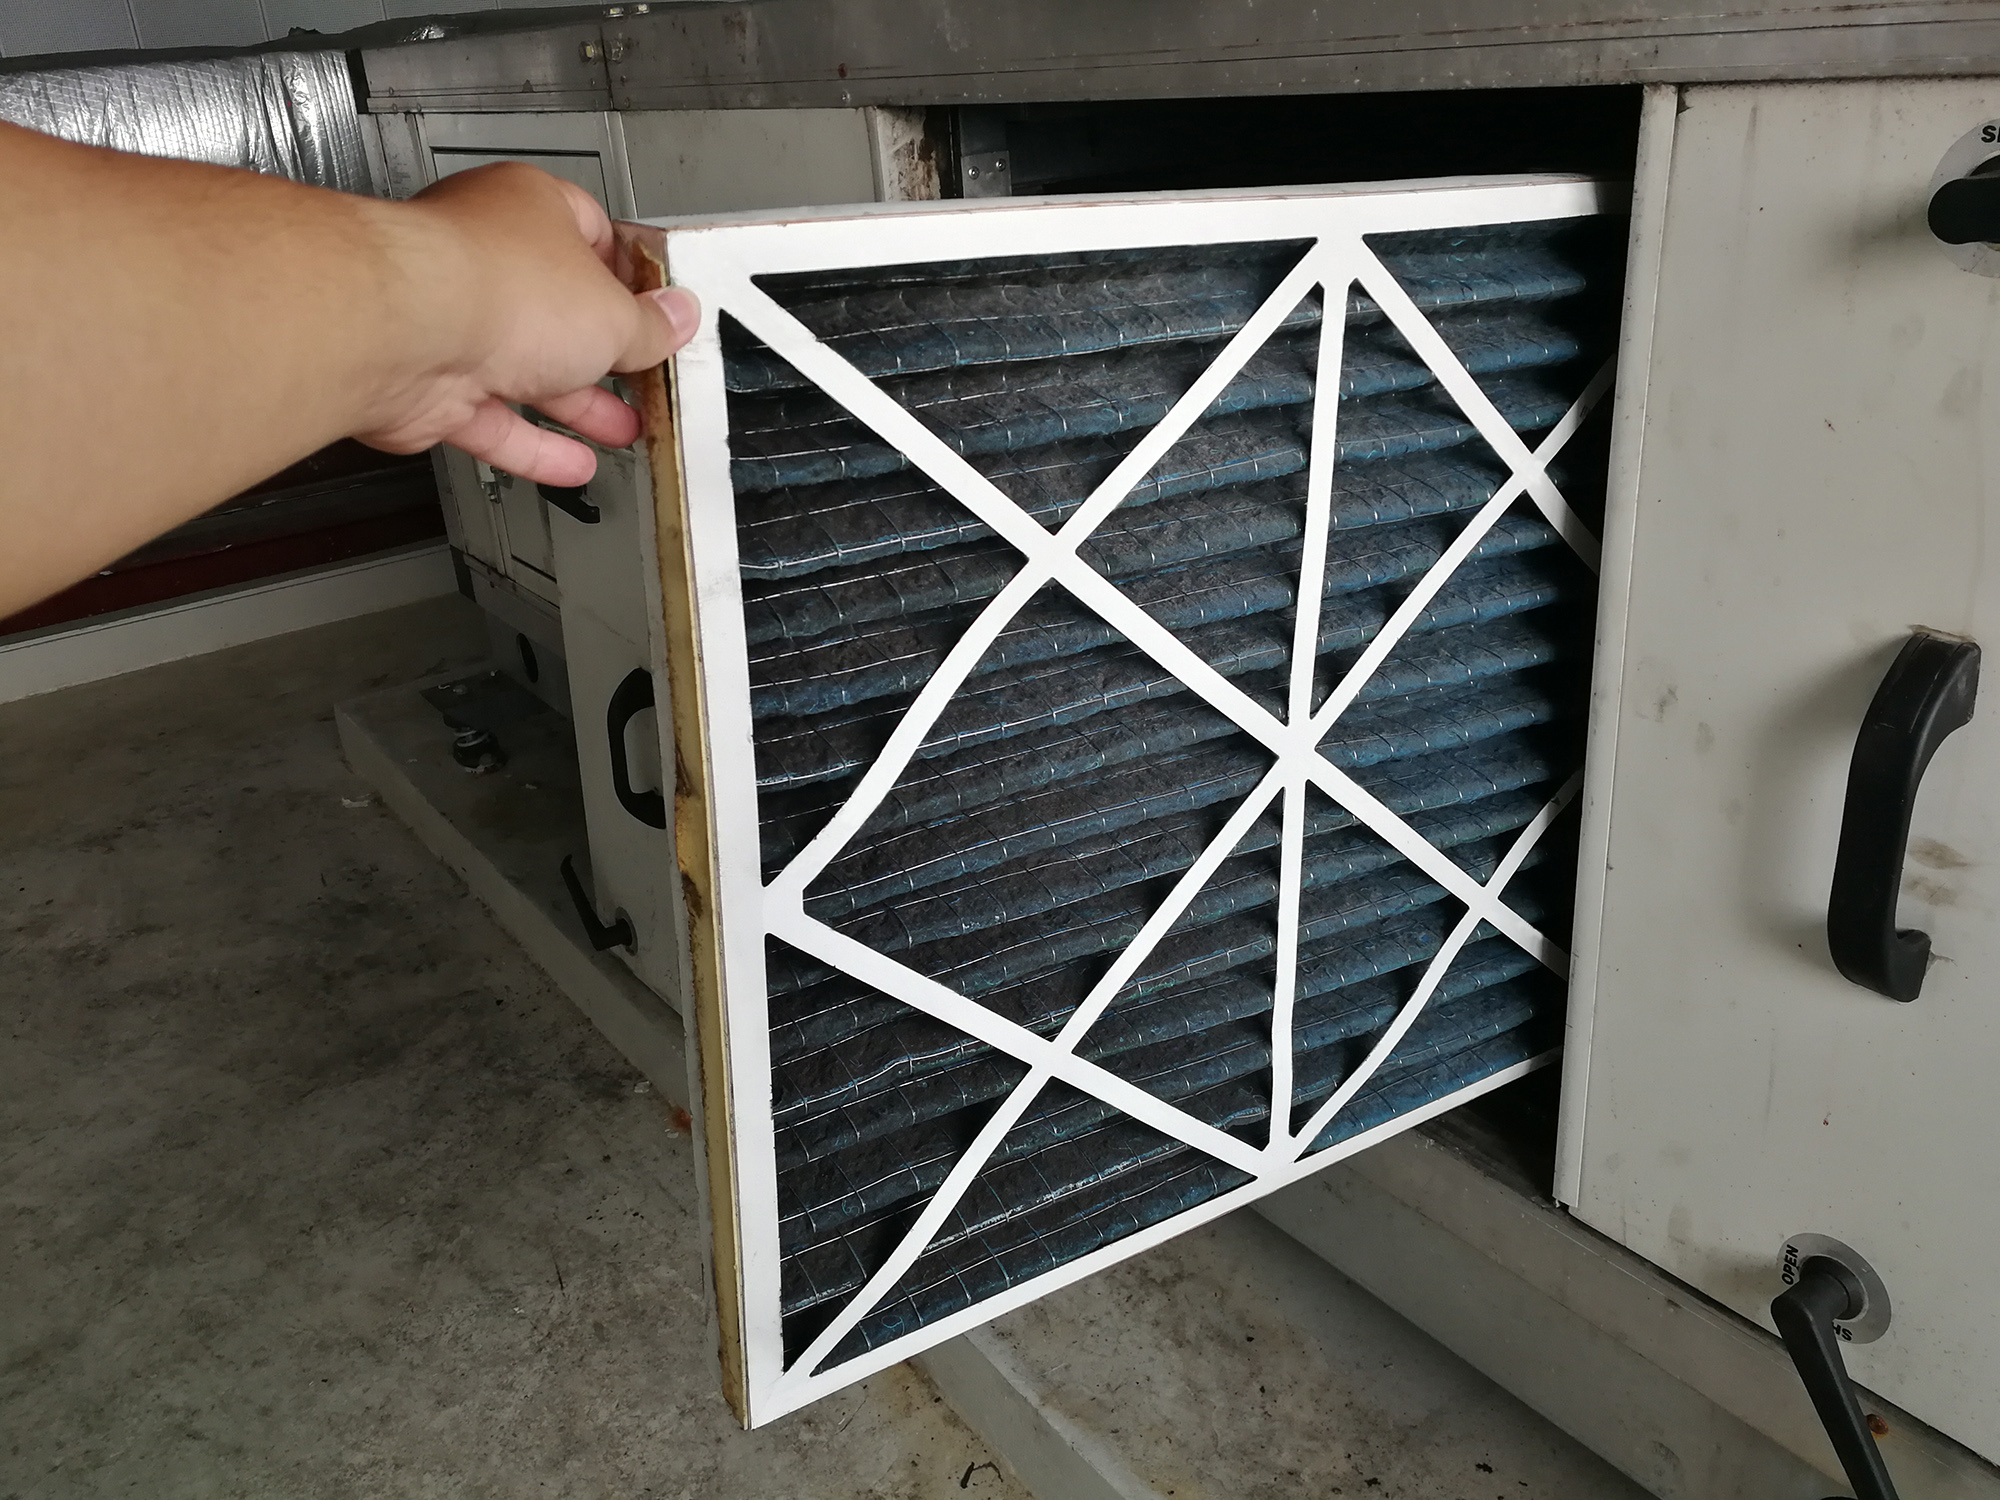
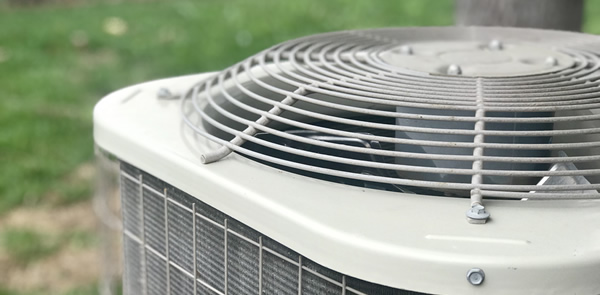
• Skip to primary navigation
  • Skip to main content
  • Skip to footer

EnergyWise

  • About EnergyWise
  • Energy Savings Tips
  • Tools & Resources
  • Contact Us

EnergyWise

EnergyWise

  • About EnergyWise
  • Energy Savings Tips
  • Tools & Resources
  • Contact Us

Energy Savings Tips

Dust Bunnies

DUST BUNNIES

Whoever in the middle ages coined the term, “Out of sight, out of mind,” must have said it right after discovering one of the favorite hangouts for an elusive and energy-stealing beast well known in the refrigeration world: the Dust Bunny. Okay, maybe they didn’t have modern refrigeration appliances in the 1500s, but dust bunnies are definitely energy-stealing pests that can shorten the life of refrigerators and freezers today. Fortunately, you can rid yourself of their effects with a little extra effort once a year (or twice if you have pets).

Before discussing how to perform this simple maintenance task, answer this important question: “Where are my condenser coils?”

If your fridge or freezer doesn’t have a toe-grill on the front, you will find condenser coils attached to the back of the unit or behind a panel held in place by a few screws. If this is the case, you will need to pull the unit away from the wall for access. The coils will look like metal tubes wound in a U-shaped grid pattern. These coils transfer heat from your unit’s refrigerant into the room’s air. If you have never cleaned them before, don’t be alarmed if you find yours surrounded by a dense colony of dust bunnies!

For the heat transfer to occur, air must pass over the coils. That air often contains dust, dirt, pollen, pet hair and moisture which builds up over time to create a great environment for dust bunnies to flourish.

Before starting, you will need the following tools: a flashlight, coil condenser brush and dust mask. As you should before working on any appliance, start by unplugging the unit. Don’t worry about spoilage. The coil-cleaning process will only take 15 minutes or less, and the doors will remain closed the whole time.

Next, don the dust mask. Though most of the dust/debris will get vacuumed up, some will likely become airborne. Start by vacuuming the loose dust and debris along the inside of the toe grill or from the backside of the fridge. If your condenser coils are underneath the unit, the flashlight will come in handy to help spot them.

Next, brush away the dust clinging to the coil with a coil condenser brush. These brushes are available at most DIY stores for around $10. Measuring approximately 27 inches long with short bristles on the top one-third, the brush’s cylindrical design lets you easily slip it between the spaces in the coil grid. Work it back and forth to remove dust while keeping the vacuum running to remove loosened dust. Once the coils and surrounding area are clean, replace any toe grills or plates previously removed, plug the electrical cord back in and push your unit back against the wall if necessary.

According to the  U.S. Department of Energy, a dirty condenser coil can increase compressor energy consumption up to 30%. While the total energy saved of 100 to 300 kilowatt-hours per year may only save $12 to $36, dirty condenser coils can shorten your refrigerator or freezer’s lifetime by up to five years. Considering the cost for repairing or replacing a broken or worn-out unit, even greater savings are realized.

Your local utility wants to help you make the most from the energy needed to keep your food cold! Contact them or visit www.nppd.com if you would like more information on other low-cost/no-cost energy-saving measures, as well as various EnergyWise℠  incentives that may be available to you.

Tips for Renters

TIPS FOR RENTERS

Not everyone can replace their furnace with a high-efficiency heat pump, either because they are renting or because they cannot afford it. However, there are still some inexpensive opportunities to reduce energy use while improving your comfort at home.

Thermostat Settings

About 50% of home energy consumption is used for heating and cooling. By carefully managing thermostat temperature settings in your home, significant savings can be realized.  The U.S. Department of Energy recommends settings of 68°F in the heating season and 78°F during the cooling season when someone is home and active. When away or during sleeping hours, they suggest turning the thermostat down to 55°F in the winter and up to 85°F or higher in the summer. If that is too cool in the winter, try putting on an extra sweater rather than turning the thermostat up.

Smart Thermostats

If you have difficulties remembering to adjust your thermostat at bedtime or when leaving, a smart thermostat may provide a better opportunity for savings. According to product manufacturers, smart thermostats, when properly installed and used, reduce heating and cooling bills by 10 to 15%. But as with any opportunity to reduce energy consumption, the savings potential depends on how much consumers are willing to leverage a smart thermostat’s benefits. Do not buy one until getting approval from your landlord, if you rent, and confirming the model you are choosing is compatible with your central heating and cooling system.

Zone Heat

If you use electric baseboard heaters and do not mind less-used rooms being colder, you might be able to save some money by zone heating. Electric baseboards make this easy since they usually have thermostats for each room. Portable electric space heaters can be a good tool for zone heating, too, if they are used safely and wisely in the area you spend the most time in and you reduce heating levels in the rest of the house. Space heaters that are used incorrectly can be dangerous and can even increase energy costs. 

Stop Air Leaks

Little gaps around windows and doors, as well as wiring and plumbing penetrations, can be sources of winter cold and summer heat. With a little weatherstripping and caulk, these air leaks can easily be alleviated, but if renting, you should probably check with your landlord before you get started. If cold air is pouring under the bottom of outside doors, a $10 door draft stopper is a simple way to block gaps and improve indoor comfort.

Windows and Window Coverings

Your windows may be letting heat in during summer days and heat out in winter. Window coverings such as thermal blinds or medium- to heavy-weight curtains or thermal blinds can help you manage your home’s heat loss or gain. In summer, keep blinds and curtains closed to prevent the sun from heating the cooler inside air. On cold, cloudy winter days and nights, window coverings can keep warmth inside. Opening up window coverings during the winter when receiving direct sunlight is a ‘passive solar’ technique that can reduce heating costs. Also, the interior of windows can be covered with clear plastic to reduce heat loss and air leaks.

Water Heaters

Since about 10% of a home’s energy use is related to water heating, turning the temperature setting down can save energy. The Environmental Protection Agency and the Occupational Safety & Health Administration recommend a setting of 120°F to optimize savings while reducing the potential from scalding.

Your local utility wants to help you make the most from the energy needed to run your home! Contact them or visit www.nppd.com if you would like more information on other low-cost/no-cost energy-saving measures, as well as various EnergyWise℠  incentives that may be available to you.

Induction Cooking
Induction Cooking

INDUCTION COOKING

Looking for the perfect gift for the chef in your family?

Looking for the perfect gift for the chef in your family? Maybe you are the chef. If so, it is time you consider one of the most evolutionary pieces of kitchen equipment since development of the microwave oven. In fact, both the microwave and induction oven were introduced at Chicago’s 1933 World’s Fair. If you are not familiar with induction cooktops and ranges, get ready to be impressed!

Induction cooking provides the responsiveness and power of natural gas or propane burners combined with the control of electric appliances. Induction cooktops and ranges look very similar to radiant or ceramic cooktops and free-standing ranges with three to six burners or cooking zones. Single-zone countertop models that plug into standard outlets are also available.

Under each cooking zone, an alternating electric current passes through a coil of copper wire. As the control switch is turned “up,” an oscillating magnetic field steadily increases an eddy current surrounding the pot or pan. The result is resistive heat that is only created in the pan itself. The cooking surface can only become as hot as the pan sitting on top!

So why else are induction cooktops and ranges superior to traditional electric, propane and natural gas technologies?

Speed – If you think gas is fast, watch induction rival! Since induction works by transferring energy straight to the metal of the pan rather than heating up an element and transferring that heat to the pan, many professional chefs find induction every bit as fast as gas.

Power through efficiency – As much as 84% of the energy delivered through the cooking zone is transferred into the food. The Department of Energy finds that around 40 percent of a burner’s heat is transferred using gas. Induction ranges can boil two quarts of tap water in less than five minutes. A gas stove will take more than eight minutes and an electric range with coils will take nearly 10 minutes.

As with all cooking, exhaust hood ventilation is recommended, if not necessary, especially with gas appliances. Electric cooking technologies do not have the same requirements since they do not rely on the combustion to create heat. Kitchen range hoods exhaust air containing the heat, smoke, flumes, and other pollutants out of the home. An equivalent amount of outdoor air must be drawn into the home to replace it. That new outdoor air will likely need to be heated or cooled by the HVAC system, which requires more energy. Not only does induction put energy into food more efficiently, it puts less heat in the kitchen!

Cleaning – Induction cooktops and ranges are simple to clean because their flat glass or ceramic surfaces have no gaps or grills to collect spilled food. Since cooking zones can only become as hot as the pan, spilled food seldom becomes baked on the enamel. When spills are caught right away, simply pick up the pan, swipe the cooking zone with a damp dish cloth and return the pan to the cooktop for no delay in cooking.

Control – Changes in temperature setting occur precisely and immediately. Traditional burners take time to cool down or heat up, and chefs must continually adjust the setting to achieve the perfect simmer or sauté. With induction, the perfect cooking level is achieved almost instantly with one setting change.

No hot spots – Because of how previously-mentioned eddy currents create heat, the entire pot or pan heats in an even, uniform pattern when centered over the cooking zone. Cooks do not have to rotate food around the pan to achieve cooking consistency.

Safety – Perhaps one of the most important attributes induction cooking brings is safety. No flames. No extremely hot burners or coils. Most induction cooktops and ranges sense when a pot or pan is on top of them. Auto shut-off features eliminate the chance of “accidently” leaving the cooking zone on. Others offer additional safety features such as child safety locks, automatic adjustment as food heats up, boil over protection and residual heat indicators. Some can even be controlled from a smart phone. Most are compliant with requirements of the Americans with Disabilities Act.

Yes, there are some drawbacks with induction cooking. First, the purchase price. Though prices have continued to decrease over the last 20 years, expect to pay a few hundred or more dollars for induction cooktops and ranges when compared to gas or other conventional electric types. Second, magnetic cookware must be used for the induction process to work. That usually means stainless steel or cast-iron cookware. However, you might be able to use an induction plate under your favorite glass, ceramic or aluminum pan to get by. Finally, as with other glass cooktop surfaces, they can be scratched or broken.

Your local public power utility want to help you cook efficiently! Contact them if you would like information on other ways to make the most of the energy that powers your life. In addition, you may be eligible for EnergyWise℠  incentives to reduce the cost of energy-saving improvements.

Rim Joists
Rim Joists

RIM JOISTS

Do you notice the early morning chill on your floors?

While it’s still dark outside, do you ever sneak into the kitchen or bathroom before everyone else wakes up and notice how cold the floors are? Worse yet, are you the last person up in the morning and still find your floorboard, tile or linoleum is just as cold as it was for the first person who got up? Since the overwhelming majority of Nebraskans don’t live in igloos, you may wonder why. Ask yourself, “Is my rim joist sealed and insulated?” If your home was built prior to the 1990s, you might want to find out.

Now, you may be asking, “Where do I find my home’s rim joist?” If you have a basement or crawl space, you  need to look directly underneath the exterior perimeter of your main floor. If your basement is finished, it may be difficult to check because of a drop-in ceiling, paneling or drywall. On most homes, the rim joists, in combination with the sill plate, are the first pieces of wood that set on your home’s masonry or concrete walls or foundation.

Prior to the 1970s, many builders assumed the weight of the house would put enough downward pressure on these boards and the home’s foundation to keep the elements out. A decade later, most contractors installed a felt or rubber gasket between the two surfaces to reduce drafts and cut down on the number of bugs slipping through any gaps. In the end-cavity spaces between floor joists, they installed fiberglass insulation in an attempt to reduce heat loss. Unfortunately, outside air and humidity still infiltrated past these materials, causing heating and air conditioning systems to run longer.

Today, many older homes have huge energy-saving and indoor air quality opportunities associated with properly sealing and insulating rim joists. A Department of Energy case study revealed that the test group of older homes with rim joists later sealed and insulated had a 11.4%reduction of outside air infiltration. This translated to average annual heating and cooling cost savings of approximately 19.3%.

The “retrofit” practice of simply insulating rim joists with fiberglass batts is no longer recommended. Because fiberglass batts are air permeable, they do nothing to prevent warm, humid interior air from contacting the colder rim joists in winter. When this warm, moist air comes in contact with the joists, water vapor condenses. As the problem continues, this condensation can eventually cause mold and/or rot in the rim joist area.

To prevent these problems, this area must be properly sealed and insulated. The entire job can be done with spray polyurethane foam or impermeable rigid foamboard in combination with an expanding foam sealant.

For the best results, a two-part insulation/sealant foam can be professionally installed or Do-It-Yourself kits are available at most hardware or home project stores. A two-inch coating will provide at least an R12 insulation value. At the same time, these products provide a vapor-proof seal between the wood and masonry. This approach is the most convenient as it combines sealing and insulating into one step. Unfortunately, this approach also tends to be the most expensive.

To reduce costs for this improvement, rigid foam board can be cut into rectangles slightly smaller than the space between floor joists. Once inserted into the cavity, expanding spray foam is applied around the foam board’s perimeter to hold it in place while providing an air-tight seal. As with the previous method, a minimum of two inches of insulating material should be applied.

Your local public power utility wants to help you make the most of the energy that heats and cools your home. Contact them or visit www.nppd.com if you would like information on other ways to keep warm this winter. In addition, you may be eligible for EnergyWise℠  incentives to reduce the cost of energy efficiency improvements.

Pivot Sprinklers
Pivot Irrigation

PIVOT SPRINKLERS

Before planting a single seed, have your irrigation systems ready to pump.

While some erroneously think farmers have the winter off for vacation, Nebraska crop producers have a million things to do before planting a single seed. One includes having their irrigation systems ready to pump and provide water if rain doesn’t come. If you irrigate with one or more of the 55,000 plus center pivot systems in Nebraska, do you know the expected life of sprinkler packages? While some producers may consider this a low-priority question, it only takes a few non-performing sprinkler components to make a significant decrease in yields; especially if left unchecked over several seasons.

Sprinkler packages for center pivots and lateral-move systems are designed to deliver more than 90 percent water delivery uniformity under no-wind conditions after considering system capacity, distance from the pivot point to a specific sprinkler, spacing between sprinklers, field topography and pumping plant performance among other potential considerations. Standardization in nozzle diameters available (diameters increase in 1/128 – inch increments) does create a small amount of nonuniformity during design.  

However, once installed and operational, nozzle wear, plugging, pressure regulator effectiveness, water quality, component quality, system leaks, weather damage and incorrect design parameters can dramatically decrease the rated life of outlet components and affect delivery uniformity as soon as the first time you irrigate.

Irrigation experts recommend the following simple, five-part inspection each spring before the crop canopy is present:

  1. Verify the system is supplied by the correct flow rate and operating pressure
  2. Compare the sprinkler sizes installed to the sprinkler design printout
  3. Verify the last sprinkler is supplied with correct operating pressure when the end gun is operating and the last tower is at its highest point
  4. Verify the end gun is set to run according to the design sheets
  5. Verify sprinklers are not cracked or broken and deflection pads are not worn excessively

As an EnergyWise℠  partner, your local electric utility wants to help you make the most of the energy needed for irrigating with all-electric center pivot or linear tower systems. Participating utilities will provide a $500 incentive when producers replace all of a system’s existing outlet components, such as sprinkler heads, sprayers, rotators, plates, pads and nozzles, and regulators on qualified systems. Other program requirements apply. Start by visiting with your local electric utility for more details.

Your local public power utility wants to help you make the most of the energy you need. That includes the electricity you need when irrigation season arrives. For additional ways you can become EnergyWise℠ , contact your local utility.

Home Office Equipment
Working From Home

HOME OFFICE EQUIPMENT

A large portion of electricity that was traditionally consumed in commercial offices and businesses has shifted to homes and alternative work locations.

More people are working from home than ever before. A large portion of electricity that was traditionally consumed in commercial offices and businesses has shifted to homes and alternative work locations. While some may not notice the increase on their monthly energy bill, others are surprised to find out how much those office electronics, combined with increased use of other household appliances, can add. Whether at home or in a conventional office, the same principles of energy efficiency apply.

Computers

Computers are usually the most critical piece of office equipment. Consider switching out old desktop PCs to a laptop. According to the American Council for an Energy Efficient Economy (ACEEE), laptops use about one-third the power (22 watts) of a typical desktop (68 watts) when in active mode. Annually, a laptop could save about $19 compared to a desktop.

Manage the computer’s efficiency settings by enabling the low-power “sleep mode” to automatically activate after a set time of inactivity. This also applies to any connected  peripheral equipment. Power management software is also available to ensure systems including connected peripherals are running as efficiently as possible.

Monitors

While more efficient flat screen monitors have become the standard for the last 20 years, not all monitors have similar energy requirements. High-resolution, ultrawide and twisted-nematic screens tend to consume more energy than general-use LED monitors. Applying “sleep” and “hibernate” settings and turning off machines when not in use can translate to significant energy savings. Unmanaged monitors left on at night and on the weekend can easily add an extra $30 onto energy bills each year.

Printers

The ACEEE also notes that most home printers have less than 75 hours of active use a year. Similar to computers, activate the printer’s power-management settings. As much as $50 in energy savings could be realized annually. Print only when necessary and use the double-sided option when possible. In addition to reducing waste and energy use, it may also extend the life of the printer.

Cell phones and rechargeable devices

These days, everything is wireless. From cell phones and headsets to notebooks and keyboards, chargers are plugged in and devices connected to ensure a full charge when they are needed. Many continue drawing power even after charging is complete. Plugging office electronics into a power strip allows users to switch all chargers and other plug-in devices “off” with one switch.

Coffee Makers

Yes, the coffee maker is a piece of office equipment! The California Energy Commission found that an average multi-cup coffee maker uses about 60 watt-hours to maintain brewed coffee at serving temperature. When left “on” throughout the day, a single unit can add $25 a year to energy costs. Instead, turn coffee makers “off” when brewing is complete, and use the microwave to reheat a cup when desired. This is also help preserve the flavor!

Your local public power utility wants to help you make the most of the energy that powers your home office. Contact them if you would like information on other ways to reduce energy use in your home. You may be eligible for EnergyWise℠ incentives to reduce the cost of energy efficiency improvements.

Infiltration
Woman drinking from coffee cup

INFILTRATION

The forces of inadequate original construction and decay of building materials over time silently feed the infiltration monster hiding in so many homes.

Infiltration! It sounds like a headline ripped off the daily news or part of a book title from a Tom Clancy action/thriller. You might dismiss what I will share as a conspiracy theory. However, you should know, this one likely involves you.

Consider the following: Everyone uses energy to heat and cool their homes. In fact, most Nebraska homes use four times more energy per year to keep them warm than to keep them cool. Thus, the forces of inadequate original construction and decay of building materials over time silently feed the infiltration monster hiding in so many homes. Ultimately, it leads to people asking, “Why is my electric bill so high?”

Conspiracy? I ask you to consider these two deceptive energy wasters and view your home in a different dimension. It requires taking a “Twilight Zone” perspective. As Rod Serling would say, “It is a dimension as vast as space and as timeless as infinity. It is the middle ground between light and shadow, between science and superstition…” It is the realm of infiltration in your home!

Infiltration is caused by wind, negative pressurization of the home, and air buoyancy forces combined with how these variables allow outdoor, unconditioned air into your living space. To put it simply, these intruders are leaks!

Where do the biggest offenders occur? According to the Department of Energy:

  • Floors, walls and ceilings (average 31%) – This includes recessed can lights that mount in an attic. If they aren’t sealed and insulated, they can leak. Another common oversight is band joist areas, which are where the house’s frame makes contact with the basement or foundation. This area on homes built prior to the 1970s was seldomly sealed, while newer homes may have missed proper sealing during construction.
    ‍
  • Ductwork (average 14%) – You might think since most ductwork is inside the space you’re trying to heat and cool, leaky ducts don’t matter. They do. They can create pressure imbalances that draw outside air into your home. Even in “tight” homes, all duct unions and joints must be sealed.
    ‍
  • Windows (average 10%) – Most people suspect windows as the main reason for energy loss in their home. In reality, unless your windows are of poor quality or have outlived their useful life, there’s another lurking problem. While you might suspect the window itself, most infiltration usually occurs around the window and how it mounts through the wall. Caulk ages and cracks over time. If sealants weren’t used when your windows were first installed, you might assume costly full-scale replacement is necessary over inexpensive retrofit sealing. The bottom line: If you feel a draft around the trim of your windows on windy days, you’ve got infiltration. Seal it up!
    ‍
  • Fireplaces (average 14%) – Who doesn’t love a toasty fire on a cold night? While ventless fireplaces and wood stoves are popular, their penetrations through an exterior wall often cause infiltration concerns. Done right, they provide an excellent source of heat and ambiance. Done wrong, they literally send your heat up the chimney!
    ‍
  • Penetrations (average 10%) – Whether it’s plumbing vents through the roof or dryer vents through the side of your home, inadequate sealing can allow unwanted air inside. Foam seal all penetrations to ensure no unwanted air from outside comes in, as well as  any unwanted “critters.”

Conspiracy? I think not. Be EnergyWise℠!

Your local public power utility wants to help you make the most of the energy they provide you. If you’d like additional information on finding and reducing infiltration in your home, please reach out to them. You may be eligible for incentives to reduce the cost of energy efficiency improvements. Your local utility can update you on other incentive opportunities.

Air Conditioner
Air Conditioner


AIR CONDITIONER

Over the next four months, Nebraska homes consume 10 to 12 percent of their average annual energy usage to keep cool.

The arrival of June brings the start of air-conditioning season. Over the next four months, Nebraska homes consume 10 to 12 percent of their average annual energy usage to keep cool.

Considering 98 percent of these households rely on a heat pump, a central air-conditioner or window air-conditioners to manage indoor comfort, nearly all of us can benefit from knowing how to optimize cooling efficiency while minimizing cooling costs. It all comes down to two simple concepts: #1 – Keep as much heat as possible outside and #2 – Deal with the remaining excess heat using the minimum amount of energy needed.

Keep the heat out!

Inspect, Seal, Insulate. Keeping hot air out and cool air in will require taking some time to inspect your home for air leaks and poor attic insulation and/or ventilation. Spotting daylight, and therefore leaks, around exterior door and window frames is easy.. Leaks through cracked caulk or windows that do not close tightly are harder to recognize. Be thorough.

Block out the sun. While you may prefer natural sunlight to turning a lamp on in the middle of a beautiful day, consider this: A Department of Energy (DOE) study found 76% of sunlight that falls on standard double-pane windows enters into your home to become heat. What does that tell you? On hot days, keep the shades or blinds closed on sun-facing windows. Highly reflective blinds can reduce heat gain by 45 percent. For even more efficiency, use dual-sided shades that are reflective (white) on one side and heat absorbing (dark) on the other. These can be reversed with the seasons. Remember, the reflective surface should always face the warmest side.

Vent it. When you shower or bathe, use the bathroom fan to remove heat and humidity. Let it continue to run for about 15 to 20 minutes after you have finished. But, don’t forget to switch it off thereafter, or you will be needlessly removing cool, conditioned air. Installing a timer switch is an easy way to assure fan doesn’t operate longer than needed.

Minimize activities that generate a lot of heat. Examples are washing and drying clothes in hot water, running a dishwasher, or using hot devices such as curling irons or hair dryers. Even stereos and televisions will add some heat to your home. If you can, wait until after dark to run these and other appliances,

Learn to love your microwave and grill. Outdoor grilling and microwave cooking are two ways to prepare food without generating extra heat inside. When only baking will do, consider making smaller portions and using a toaster oven.

Maximize cooling while minimizing energy

Get a cooling system tune-up. According to the Air Conditioning Contractors of American Association, the average system loses 5% efficiency a year as it becomes dirty and requires maintenance. Your local utility may have a $30 EnergyWise℠ incentive available for a professional to provide a tune-up.

Keep your vents clear. Your air conditioner can’t work efficiently if your vents are blocked by rugs or furniture. Check all vents to make sure they’re open, free of dust and directing air toward the center of the room. Balancing the flow of air is essential for optimizing your system’s efficiency.

Check and change your filter regularly. Different filters in different homes require changes at different frequencies. If you are not sure about yours, check it monthly for one year until you understand how often and after how much use changes are needed.

Use ceiling and pedestal fans. According to the DOE, fans allow you to raise your thermostat four degrees without any reduction in comfort. Just make sure your ceiling fans are turning counterclockwise for summer and that you don’t leave fans running in empty rooms. Fans don’t cool air, just people!

Upgrade to a smart thermostat. The latest thermostats can be controlled from anywhere with the tap of a smartphone, making it easy to warm things up a few degrees when you’re away from home. Many smart thermostats can even learn your heating and cooling habits and anticipate your home comfort needs to save you money. Again, check with your local utility to see if you qualify for a $25-$100 EnergyWise℠ incentive available for installation of a qualified smart thermostat.

Don’t crank it! Avoid setting your thermostat to a colder setting than normal when you turn on your air conditioner. It will not cool your home any faster and could result in excessive cooling and unnecessary expense.

Free cooling. If you have a day where it cools off at night, turn off your cooling system and open your windows while sleeping. Do not forget when you wake in the morning to shut all your windows and blinds before it gets hot again, or your air conditioner will have to make up for your temporary amnesia.

Your local public power utility wants to help you make the most of the energy they provide you. That includes keeping your home cool this summer. For more ideas on how you can make your home EnergyWise℠ , contact your local utility.

Hot Tubs
Hot Tub


HOT TUBS

Nothing beats a soak in your hot tub after a hard days’ work, but it can also be the source of high energy costs.

It doesn’t matter what time of year it is (except maybe August); nothing beats a soak in your hot tub after a hard day’s work. Whether you’ve got sore muscles of which only pulsating jets will take out the tension or a tension headache that requires the enveloping warmth and soothing sound of air bubbles rising to the surface, many of us consider a good “soak” the best way to restore our physical and mental well-being. The trusty hot tub can also help us get a few hours of rest before we start our whole routine over again the next morning.

If we’re not careful, this source of rejuvenation can also be the source of high energy costs. Perhaps your hot tub sales representative said adding a hot tub should only add $10 to $20 per month to your electric bill. That may be so if you install yours in a climatically-controlled room using perfect energy management practices. In reality, installation location along with a lack of attention to maintenance and temperature settings often create energy cost surprises five to 10 times greater than this during Nebraska’s winter months. So much for that “relaxing” feeling!

Today’s initial cost for a new hot tub can range from $2,000 to more than $20,000. Mid-grade hot tubs have an average lifespan of about 10 years. Lower quality models, improper installation or inattention to maintenance may only provide you five years. Better warrantied, higher-quality and well-maintained systems can surpass 25 years of active use. Here are four important considerations in keeping the “hot” in your hot tub throughout the years without breaking the bank:

Location – If your hot tub is outside, insulate and seal around it well. If possible, provide some sort of shelter from cold winds. While most lower-to-mid-level tubs come with their own insulated housing, some may not give consideration to heat loss from the bottom of the unit. If it’s inside, significant air-quality and air-conditioning issues need to be addressed to avoid molds, mildews, etc. Check your owner’s manual or reach out to the manufacturer, as location has the largest influence on energy usage.

Cover – Install and use a quality cover whenever the tub is not in use. Since the water surface loses the most heat, uncover only when using it. To further reduce energy losses due to evaporation, install a secondary “thermal blanket,” which floats on the water’s surface. Neglecting to cover and seal up your hot tub when not in use will have a major impact on energy usage regardless of where it is installed.

Settings – Check your owner’s manual or ask your dealer how low you can set your tub’s temperature and have it heat up to your comfort level in a reasonable amount of time. The lower you can leave the temperature when it’s not in use and the longer between uses of the tub, the more you can save. Usually, hot tub thermostats come preprogrammed at 104°F. A rough rule-of-thumb is that it will take 15 to 20 minutes to regain each degree you turn the thermostat down. Contrary to urban legend, you don’t lose the savings when you turn the temperature up again.

Maintenance – If it says, “Replace filter after 18 months”, DO IT! Replace more frequently if your tub takes in more dust, is exposed to more airborne particulates or if it’s used by numerous people. When in doubt, refer to your owner’s manual.

Your local public power utility wants to help you make the most of the energy you need. That includes the electricity needed to run your hot tub: your magical revitalization machine! For additional ways you can become EnergyWise℠ , contact your local utility.

Icicles
Icicles


ICICLES

The “Magic” of Icicles

Can you think back to your childhood and remember the “magic” of icicles? While growing up in a century-old farm house, I remember wintry “No School” days when my mom would bundle me up in so many layers of sweatshirts, coats and overalls that I could barely move. Then, I’d waddle outside and start my polar expedition around the farm to discover the winter wonderland and search for the perfect icicle.

Inevitably, I would find the most beautiful ones hanging from the gutters on the south side of the house. Over the next couple of hours, I would keep checking to see how much they had grown. Then, before they became too long, I would break them off and carefully put them in the deep freezer thinking how refreshing they would taste in July when it’s 95°F.  Sadly, I never experienced that summertime sensation because mom always threw them out when she defrosted the freezer during spring cleaning.

Unfortunately, not all stories involving icicles are as innocent or benign. It seems every winter, we hear a news of someone injured by falling icicles. More likely, we hear very little about the gutters pulled off homes when the icicles become too heavy or the ice that builds up on the roof behind them, melts and rots wood in attics. Their beauty disguises the warning of other potential damage including loosened or broken shingles, cracked chimney stacks, ruined insulation, damaged drywall or even a roof collapsing.

Icicles form on days when the outdoor air temperature is subfreezing but heat escaping through the attic melts snow or ice on top. As it drips off the roof, a water droplet freezes as it loses heat to the cold air. Over time, ice gets thicker and thicker to create an ice dam. Eventually, the water behind the ice dam builds up enough to push under the shingles and into the house.

Roof rakes, heat cables and ice dam removal companies only address the symptoms of ice damming. While you may never completely eliminate icicles, there are two parts to a long-term solution: reducing the heat escaping into the attic and removing the heat that does.

Attic insulation and air sealing

Since most of this misplaced heat comes from below the attic, ensure proper insulation and air sealing. According to the Department of Energy, Nebraska homes should have enough insulation to equate to at least an R49 value in attics. This value is equal to about 15 inches of fiberglass batt material assuming an average of R3.25 per inch of thickness. Note that if you have loose-fill insulation in your attic, the R-value of does not change proportionately with thickness. Rather, manufacturers provide coverage charts that specify the amount needed to achieve a particular R-value.

Air leaks transmit a lot of heat into the attic quickly. When trying to seal up sources of these leaks, pay particular attention to the following items that often penetrate into the attic:

  • Chimneys
  • Plumbing stacks
  • Recessed lighting from the ceiling below
  • Bathroom and clothes dryer ventilation

Of the four, bathroom and clothes dryer exhausts can be the worst. Not only do they bring heat into the attic area, some are not completely ducted outside and dump warm, moisture-laden air right into the attic. This often leads to problems similar to ice damming such as rotting rafters, ruined insulation, moisture inside walls, mold, and peeling paint.

More attic ventilation

Though secondary to insulation and sealing, ventilation is also important. No matter how much you insulate, some heat will still come through. Proper attic ventilation promptly moves the undesired heat outdoors before it causes melting on your roof.

Many homes built before 1980 have inadequate attic ventilation. When checking your attic’s insulation levels, look for these signs of moisture problems:

  • Damp insulation
  • Unnaturally dark or discolored decking
  • Dark streaks on roof boards around nails
  • Orange resin beads on rafters signaling sweating wood
  • Moisture on roof boards and rafters
  • Crumbling, curled roof shingles

Your local public power utility is happy to help you make the most of the energy needed to keep you warm, safe and sound this winter. For additional ideas, as well as information on EnergyWise℠ incentives to help with the cost of efficiency improvements, contact your local electric utility.

Holiday Surprises
Gift


HOLIDAY SURPRISES

Ever rediscover a holiday Christmas gift you intended to give during the holidays?

Ever rediscover one of those Christmas gifts you intended to give during the holidays but forgot where you hid it until the following February? It can be a pleasant surprise if you can still gift it in the future, return it for a refund or use it yourself. Unfortunately, your January or February electric bill may reflect similar holiday surprises. I’m referring to those things you did or items you used during the festivities that may have negatively impacted your electrical bill. Unfortunately, you can’t undo or “re-gift” these holiday surprises, and you will have to pay for the energy they waste regardless of whether they added to your seasonal cheer.

Space heaters

Nobody wants to be cold for Christmas! To chase away the chill, you may find it convenient to plug in a portable space heater in a spare bedroom or other seldomly-used area to accommodate guests. But do you shut off the heater after they leave?

When investigating wintertime “high bill” inquiries, the most common responses residential energy consultants hear about space heaters is, “Oh, that little heater couldn’t have added that much to my bill!” Nearly all space heaters have more than one temperature setting. Of those, the highest setting usually operates around 1,500 watts or 1.5 kilowatts (kW). If the heater operates continuously at that level for an entire month (30 days or 720 hours), it will add 1,080 kilowatt-hours (kWh) to your electric bill. At Nebraska’s 2019 average residential price of electricity (11.84¢/kWh), that little heater magically adds $128! Don’t open yourself up to this kind of surprise. To ensure the heater does not operate when unneeded, simply unplug it.

Chimney flue

A warm and glowing fire invites everyone to share in the spirit of the season. But once the embers are extinguished and the fumes vented, heated indoor air continues to escape up the stack. Surprise! As soon as safely possible, tightly close the damper to minimize the amount of conditioned  air escaping up the chimney. Check the seals around your damper, then repair or replace dampers that don’t tightly seal.

Exhaust fans

Whether it’s grandma trying to clear the kitchen of smoke from burning bacon or Uncle Eddie clearing the bathroom from whatever was burning him, somebody’s going to turn on an exhaust fan. Chances are, that fan will continue to run long after pollutants are gone. Kitchen exhaust hoods can often draw 250 to 500 cubic feet of air per minute (cfm). Bathroom exhaust fans remove 50 to 150 cfm. When they are ducted to the outdoors, conditioned air pulled out of the house is replaced by cold outdoor air that is sucked in through gaps or tiny cracks around windows, doors, foundations, rooflines or other wall penetrations. All this “new” air must be heated to maintain indoor comfort. To minimize the amount of additional heating required, turn kitchen exhaust hoods off as soon as airborne food contaminants are removed, and install a timer switch on bathroom fans to minimize over-exhausting.

Gaming systems

Inevitably, Santa will bring some lucky child one of newest gaming systems, like the PlayStation 4 Pro, rated at a maximum of 165 watts, or the Xbox One X, rated at 245 watts, or even worse, a dedicated Gaming PC drawing 750 continuous watts. Then, with delight in their heart, that child will skip gleefully to the room with your entertainment center and connect their new gaming system to your 85-inch big screen television that draws 175 watts, as well as  the surround sound system that pulls another 150 watts. For the rest of the holiday vacation, they become affixed to YOUR couch challenging siblings, aunts, uncles, and even the mailman to a video game showdown while your electric meter is spinning. Now ask yourself this – “What is the likelihood of them turning off everything when they finally put down their controller?” Go and check to avoid this surprise. Better yet, if electronics won’t be used in the next few hours, unplug them, as most electronics still draw a small amount of power when they are turned “off.”

Lights

By now, you know LED Christmas lights can use up to 99% less energy per bulb than conventional incandescent lights. But if your home is filled with family and especially young kids this season, anticipate every light you own will be turned on at some time. According to a survey conducted by Lutron Electronics, 90% of Americans say someone in their household forgets to turn the lights off when they leave a room. Surprised? Don’t be. After your last guest leaves, take a thorough tour of your home and outside buildings. You’ll likely be glad you did.

Your local public utility wishes you and those closest to you the best of holiday seasons. For additional ideas on how you can make your home comfortable and EnergyWise℠ this winter, contact your local electric utility. You may even find you are eligible for incentives to help with the cost of energy-saving home improvements.

HVAC Filters
HVAC Filter


HVAC FILTERS

How important could a filter be?

The end of the year is a busy time. In addition to several holidays squeezed into the final sixty days, we have winter to worry about. Of course, I always forget to prepare the snow blower for its first use of the season until at least three inches have fallen and the thermometer is way south of 32 degrees Fahrenheit.  But when this season rolls around, I always remember to check and change the furnace filter in my heating and cooling (HVAC) system. Those who forget both the filter and the snow blower may find the snow-packed driveway is the least of their problems.

How important could a filter be? Consider the following potential impacts:

Inefficient heating and cooling
‍
The whole reason you have an HVAC system is to keep comfortable inside. Dirty filters reduce airflow and the system’s ability to condition the air in your home. According to the Department of Energy, a furnace or air conditioner with a clogged filter can use 15 percent more energy than one operating with a clean one.

Higher cost of utility bills
‍
Every year, energy efficiency professionals like me start hearing concerns about the high cost of utilities after homeowners and renters receive their January or December bills. Incidentally, these two months have the highest heating requirements respectively and on a historical average. An inefficient HVAC system only makes these bills higher.

Uneven temperatures inside
‍
Most duct systems are designed with the assumption that, with a clean filter, the furnace or air handler will move an adequate volume of air to keep temperatures balanced throughout your home. Diminished air flows due to a dirty filter often result in a room or rooms not receiving the same amount of conditioned air as others.

Short cycling or equipment failure
‍
Reduced air flow due to a dirty filter can cause your heat exchanger to overheat and shut off before your thermostat’s setpoint is reached. In a relatively short period of time, it will continue to cycle on and off. If this happens too often, the electronic “limit switch” safeguard can fail, and the furnace won’t fire up at all. Now, you’ll have a bill from a HVAC technician for parts and labor. Of course, Murphy’s Law states this will occur on the coldest day of the year outside of normal business hours to optimize the technician’s fees.

A similar problem can occur in the middle of summer. A clogged filter can cause the evaporator coil to freeze up because not enough air is moving through it to remove the condensation produced during the cooling process. If I had to predict, this will inevitably occur to filter abusers over the Fourth of July weekend in order to once again, optimize the HVAC technician’s fees.

(By the way, the dirt that gets past a filter can also make its way into the fan motor and other parts, causing damage to those components.)

Puts the pressure on your lungs
‍
Relying on your lungs to filter out all the contaminants that can potentially be in indoor air could mean you find yourself sick or feeling ill more often. Those contaminants might include: dust, mites, spores, mold, ash, pollen, pet dander, bug parts, hair, lint, tobacco smoke, food particles, pesticides, paint vapors or fumes from cleaning products. A clean filter removes portions of most of these contaminants to create a healthier home.

Is once a year often enough to change your filter? No, probably not. However, if you’re not currently changing your filter at all, this is a start. Some heating and cooling experts recommend changing your filter every month. While this practice may ensure you never operate your system with a dirty filter, you may be throwing a good filter away prematurely. If you’re serious about addressing the issues discussed above, I recommend checking filters monthly for one year until you understand how often and after how much use changes are needed. Some filters may require replacement each month, but if your system runs very little, such as during mild months, you may get additional use from the same filter. Also note that some filters are designed to last multiple months. Only through observation and following manufacturers’ recommendations can you best gauge optimal replacement frequency.

Not sure which filter to select? Visit with your HVAC technician or retail expert to assure your selection provides the best filtration possible without negatively impacting your system’s performance.

Your local public power utility wants to help you make the most of the energy they provide you. That includes helping you keep your home’s heating and cooling systems running efficiently. For assistance in making your home EnergyWise℠, contact your local utility.

Mercury Vapor Lights
Outdoor Light


MERCURY VAPOR LIGHTS

This real-life tale might be even scarier if you still use mercury-vapor lights to cut through night’s darkness

While the Halloween season and this article’s headline may make some horror movie fans wonder if I am going to share an energy-efficient way to rid your place of vampires, this real-life tale might be even scarier if you still use mercury-vapor lights to cut through night’s darkness. If you are one of the unsuspecting owners of the thousands I still see during my nocturnal travels throughout Nebraska, the following facts may leave you screaming in horror!

Cost of Operation

Let us “cut” to the chase. Mercury-vapor lights are expensive to operate. The standard 175-watt mercury-vapor lamp requires a fixture with a ballast to operate. Most people do not realize the ballast uses energy too. So in reality, it takes 205 watts to illuminate one bulb. Operating an average of 12 hours per night, over the course of one year, will use 898 kilowatt-hours (kWhs) of electricity. Using Nebraska’s average residential rate of 12.4¢/kWh, that costs $111.35 every year. Judged against light-emitting diode (LED) fixtures, a 50- to 75-watt LED will provide comparable lighting levels for only one-quarter to one-third the energy use.

Longevity of Useful Light

Looking at a mercury-vapor lamp’s estimated lifetime, one might think 24,000 hours is a long time, but it’s little more than five years when averaging 12 hours per night. After six years, some may think, Hey! This bulb is lasting longer than they said it would! That is because mercury-vapor almost never dies! But, sometimes a DEAD light bulb is better than one that just gets dimmer and dimmer while devouring the same amount of electricity! After only the first year, mercury-vapor lights have lost nearly 20 percent light output. By comparison, LEDs lose less than 2 percent over the same period.

False Sense of Security

Many feel an exterior light burning “from dusk till dawn” will dissuade criminals from approaching. However, the glare produced by mercury-vapor can create harsh shadows to hide in and, if reflecting off a shiny surface, can “redline” surveillance cameras. Security experts agree that a motion-sensing LED floodlight in the 100- to 200-watt range is far more effective. Its sudden brightness will startle intruders and produce less-predictable shadow patterns. Not to mention, werewolves hate LEDs.

Attracts Critters

Most insects, including the bloodsucking ones, are photophilic, which means they are attracted to light and especially light in the ultraviolet spectrum. Mercury-vapor bulbs are great at creating ultraviolet (UV) light! Not long after these pests show up, the other creatures that prey on them, like spiders, bats, rodents and snakes show up for the “all-night” buffet you provided. Some outdoor LED fixtures are created to generate no or very little UV. Thus, they attract fewer types of bugs. Simple equation: Less bugs = less buffet = less icky critters.

Light Pollution

“Big City” dwellers often forget what the night sky is supposed to look like until they visit the country. Why can’t anyone see the stars in downtown New York? All the man-made light drowns them out. Mercury-vapor, like high-pressure sodium and metal-halide bulbs, emit light in nearly all directions. Though fixtures help direct the light to where it is desired, the majority is wasted as it overwhelms the sky, creates driving glare for passers-by or keeps a nearby neighbor up all night as it shines through their window. Since LEDs create directional light, it is easier to focus the light where it is needed most. This is especially beneficial if you live next to a cemetery. No reason to let ghosts and zombies you live in the neighborhood.

Your local public power utility wants to help you make the most of the energy they provide you. That includes illuminating your darkest nights and keeping the nocturnal bloodsuckers away. For assistance on making your home EnergyWise℠, contact your local utility.

Attic Ventilation
Attic Ventilation


ATTIC VENTILATION

Ensure a durable and energy-efficient home

We insulate our attic to keep heat out of our home in summer and keep heat in during winter. So, why would we purposely allow outside air to enter the attic through vents? To some, this sounds counter intuitive. However, this is exactly what must be done to ensure a durable and energy-efficient home!

In summer, the sun beats down on the roof and heats up our attic spaces. Natural air flow moves the super-heated air out, while insulation resists heat transfer into the rest of the home below. The inherent property of warm air to rise creates convection currents that move the heat buildup through vents at the top. This process reduces the work air-conditioners must do to keep our homes comfortable.

A well-designed attic ventilation system has a combination of intake vents at the lowest point in the attic, typically in the soffit or near the roof’s edge, and exhaust vents at or near the ridge or peak of the attic. With proper design, attic or whole house fans are not necessary. In fact, these fans can create a negative pressure in the attic that draws conditioned air through the ceiling below.

Natural circulation created by this thermal effect can have even greater value during the winter. Obviously, heat does not travel from attics into the living quarters during the heating season. Rather, heated indoor air travels into the attic from the home below – along with moisture. The warmer air is, the greater its capacity to hold moisture.

Problems start when this warm, moist air hits cooler rafters, trusses and roof sheathing. As this air cools, moisture condenses out of it and creates water droplets or frost. Eventually, this condensation drips on the insulation below. If the insulation gets too soaked, its volume compresses and its effectiveness is reduced. This leads to greater heat loss and colder rooms. Colder rooms lead to a greater need for heat, and greater use of the furnace leads to higher energy bills.

Condensation is not only problem for insulation, but other building materials as well. Absorbed into lumber, this moisture can cause wood rot and deteriorate roofing materials. As the moisture soaks into attic floors and eventually into ceiling materials, water stains and paint damage will begin to appear in the rooms below.

Perhaps the largest concern improperly ventilated attics can cause in the winter is ice damming. This occurs when attics become too warm and snow melts off the roof, only to re-freeze in the gutters. As they build up, ice dams can cause significant structural damage. Proper insulation and ventilation keep attics cold in winter by reducing the entry of heat and moist air from below. These practices also expel moisture that does make it through the ceiling below.

Note that the most common mistake homeowners make when installing insulation is to block the flow of air at the eaves. Never cover soffit vents with insulation! Rather, check all attic vents periodically, and remove any obstructions to ensure proper airflow. It will keep you cooler this summer and warmer next winter!

Your local public power utility wants to help you make the most of the energy they provide you. That includes heating and cooling your home efficiently and effectively. For assistance in making your home EnergyWise℠, contact your local utility.

Laundry
laundry


LAUNDRY

Consider some of the following ways to save energy while keeping everything clean.

Though Benjamin Franklin said the only things for certain are death and taxes, he obviously forgot laundry. Everyone contends with it in one way or another. The majority of us have our own washer and dryer at home. Depending on your appliances and strategy for conquering this never-ending task, laundering could account for up to 13 percent of your household’s annual energy use. Consider some of the following ways you might save some of that energy while keeping everything clean.

Start with the washer. Did you know that with traditional laundering practices in the past, 90 percent of the cost of running a clothes washer went toward heating water? With recent advances in formulating laundry detergents, most loads can be done with lower or cold water temperatures and still remove dirt and stains. Oxygenated cleaners and bleach alternatives allow you to brighten whites with cold water too.

Likely, you will still need hot water cycles for dealing with oily stains, dirty diapers, or sanitizing sheets and towels when desired. Since 120°F water is sufficient to accomplish any of these, now is a good time to check your home’s hot water temperature. Test it with an accurate thermometer at the faucet nearest to your washer. Be sure the water runs long enough to reach its maximum temperature. Adjust your water heater and check again until you achieve a 120°F setting.

If possible, only do full loads or adjust settings on your washer for partial loads. Increase your washer’s spin cycle speed and/or time to reduce energy use in the clothes dryer. Your machine may have additional settings that optimize efficiency. If you are not sure, review the owner’s manual.

The average life expectancy of a washing machine is 12 years. If your washer is nearing or past this age, be sure the replacement you select is ENERGY STAR-certified. Units that have earned the ENERGY STAR are about 25% more efficient than non-certified models that simply meet the federal minimum standard for energy efficiency. Consider buying a front-loading machine. On average, they use two-thirds less water than top-loading units, which could also reduce water heating costs.

With a load freshly washed, move to the dryer. Always clean the lint screen between loads. This improves air circulation and increases the efficiency of your dryer. If you use dryer sheets, know they can leave a film on the screen that reduces air flow. Scrubbing the filter in warm water with a soft brush will remove this film.

Assuming you are like the majority of Americans who have a vented dryer, when was the last time you cleaned your dryer duct? If it has been more than one year, DO IT NOW! Not only will lint build-up reduce air flow and increase energy use, it can become a potential fire hazard.

Although rigid duct is best, most households use flexible duct for convenience. If so, be sure to keep lengths of flexible duct as short as possible while making turns as gradual as possible to minimize lint build up and restricting air flow. Operating your vented dryer without being vented to the outdoors is not recommended due to indoor air quality, health concerns and potential fire hazards. At a minimum, doing so can dramatically increase your air-conditioning costs during the summer.

If your dryer has them, use the efficiency features to reduce energy use. Selecting the automatic cycle instead of timed drying utilizes the dryer’s one or more moisture sensors to determine when laundry is dry to avoid overdrying. Since dryer sheet residue can build up on sensors and cause the dryer to shut off prematurely, you should consult the operator’s manual as to how and when to clean the sensors.

Even less than washers, the average life expectancy of a clothes dryer is 11 years. When considering replacement, select one that ENERGY STAR-certified. Compared to non-certified models, dryers receiving ENERGY STAR certification are 20 percent more efficient.

Finally, consider that using a clothes line outside during warmer months or an inside drying rack saves all of the energy from using a dryer. Though the drying process is much slower than using your dryer, it is also gentler on clothing.

Your local public power utility wants to help you make the most of the energy they provide you. That includes the energy needed to deal with never-ending loads of laundry. For more ideas on how you can make your home EnergyWise℠, contact your local utility.

Swimming Pools
Swimming Pool with beach ball

SWIMMING POOLS

Your personal “pond” could leave you hot under the collar when it comes to the increase in utility bills.

There is something pretty cool about having your own backyard swimming pool. But your  personal “pond” could leave you hot under the collar when it comes to the increase in utility bills. Full-sized residential swimming pools can use as much energy during the summer months as the rest of your home over that same period. Here are a few ways you can reduce the cost of maintaining your pool this season.

Use a pool cover. Swimming pools lose energy in a variety of ways, but evaporation is by far the largest source of energy loss, whether you’re trying to naturally heat your pool or you’re using a pool heater. Covering your pool when it is not in use is the single most effective means of reducing pool heating costs that will yield savings of 50 to 70 percent.

It is best to use a cover specifically designed for swimming pools. One of the lowest-cost covers made specifically for swimming pools is the bubble (or solar) cover. Bubble covers are similar to bubble packing material except they use a thicker grade plastic. Vinyl covers are made from heavier material and have a longer life expectancy than bubble covers.

Pool covers should be used throughout the swimming season. Take the cover off just before swimming, and replace it as soon as you are done using the pool.

Turn down the temperature. 78°F is great! In fact, the American Red Cross recommends 78ºF for competitive swimming. You will use about 40 percent less energy than if you were to set it at 82°F. Turn the temperature down or turn off the heater whenever the pool will not be used for several days. It is a myth that it takes more energy to heat a pool back to a desired temperature than what is saved by lowering the temperature.

Right-size the pump. You can save energy and maintain a safe and sanitary swimming pool temperature by using a smaller, higher efficiency pump and by operating it only as much as necessary. For most residential pools, a ¾-horsepower or smaller pump is usually sufficient unless your pool rivals most others in size.

Operate the pump wisely. Pool pumps often run much longer than necessary. Many believe it’s necessary to keep their pool’s water circulating to keep the chemicals mixed and debris removed through the filtration system. However, as long as water circulates while chemicals are added, they should not separate even in still water. Some feel continuous pumping is easier than using a skimmer or vacuum to remove large debris. Along with oversizing, homeowners can unnecessarily add another $100 to the monthly summer electric bill by not reducing pump use to when it’s really needed.

Most pool professionals suggest reducing your pumping and filtration to six to eight hours per day. If the water does not appear clean, increase the time in half-hour increments until it does. Install a timer to control the pump’s cycling. If debris is a problem, use a timer that can activate the pump for several short periods throughout the day to keep the pool cleaner.

Keep the intake grates clear. Clogged drains require the pump to run longer to sufficiently filter your pool. Remember to backwash your filter appropriately. While backwashing too frequently wastes water, not backwashing often enough wastes energy by requiring the pump to operate longer due to clogging debris.

Your local public power utility wants to help you make the most of the energy they provide you. That includes making the most efficient use of your swimming pool this summer. For more ideas on how you can make your home or business EnergyWise℠, along with possible energy efficiency financial incentives, contact your local utility.

Household Fans
Ceiling Fan


HOUSEHOLD FANS

Fans help manage costs while maintaining indoor comfort.

Hot weather means Nebraska households will try to find ways to beat the heat without driving up air conditioning costs. If used properly, fans help manage these costs while maintaining indoor comfort. But used incorrectly, your next electric bill might be a shocker!

During the air conditioning season, household fans are used for two primary purposes: circulation and ventilation. More on the pitfalls of ventilation later.

According to www.energy.gov, circulating fans include ceiling, table and floor fans, and fans mounted to poles or walls. These fans create a wind chill effect that makes people more comfortable in their home, even if it’s only cooled by natural ventilation or a small window air conditioner.

While air conditioners use compressors and refrigeration cycles that are much more energy intensive, fans only move air and require much less electricity. Their energy saving opportunity becomes more important when considering human physiology and thermodynamics. By blowing air around, the fan makes it easier for the air to evaporate sweat from your skin, which is how you eliminate body heat. The more evaporation, the cooler you feel. If a room’s air is well circulated, the process is improved.

Ceiling fans are considered the most effective at room circulation. According to a study by the Department of Energy, ceiling fans enable occupants to raise the thermostat setting about 4°F with no reduction in comfort. During those times when it’s just slightly warm in a room, ceiling fans allow people to avoid using the air conditioner. But too often, people forget to switch ceiling fans and other circulation fans off when leaving a room for an extended period of time.  Fans cool people, not rooms, by creating a wind chill effect on their skin.

Table, floor, pole and other fans provide effective air movement in a particular direction or area. Often, they can be used to move cooler air from cooler parts of the home to the rooms being occupied.

Now, for those “other” fans: the ventilators. When effectively used, they can help manage home cooling costs. Unfortunately, overuse or misuse can increase air conditioning costs.

Window fans are a classic example. When the sun sets and outdoor air cools, window fans use little energy and can provide effective cooling to a stuffy home. They are best mounted in windows facing away from the prevailing wind and exhausting hot air from inside. Tightly close windows near the fan and open windows in rooms far from the fan. Windows near cooler shaded outdoor areas provide the best intake air. But when the fan is forgotten or the window is left open and the hot sun of a new day is bearing down, the cooling effects of the night before are quickly lost, and air conditioning must take over.

Bathroom fans are excellent for removing hot, humid air after showers and baths. Unfortunately, these fans often run much longer than needed to remove excess moisture. As they continue to operate, they exhaust cooled, indoor air at the rate of 60 to 180 cubic feet per minute until turned off. To prevent this from happening, install a timer switch with a maximum of 60 minutes. This should keep the fan running for at least 10 minutes after you leave the room to remove excess humidity.

Cooking can create lots of extra heat and humidity in the kitchen. If you must use ovens, cooktops or other heat intensive appliances during hot weather, a ducted kitchen exhaust fan is a must. Like a bathroom fan, they are ideal for removing extra heat and moisture out of the conditioned space. But over-ventilating is even more of an issue because many kitchen exhausts can move 90 to 350 cubic feet per minute. This can require up to one ton of your home’s air conditioning capacity to replace!  

Finally, many people assume attic or whole house fans are guaranteed to save on cooling costs. The idea is the attic gets very hot because there is not enough ventilation. In turn, that heat seeps through the ceiling into the living space below, which then requires air conditioning to cool the room. These fans are often installed with an entry louver at the other end of the attic and a thermostat switch, so they only operate when it gets hot. What the homeowner doesn’t consider is that the fan is drawing air from ALL places it can, not just the entry louver. That includes through the ceiling of the room below. This is possible through  gaps around light fixtures, ductwork and other penetrations. Without realizing it, the need for replacement air conditioning can offset the benefit of a cooler attic. Other means of attic ventilation, insulation and sealing are much more cost effective.

Your local public power utility wants to help you make the most of your energy dollars by reducing cooling costs. For more ideas on how you can make your home or business EnergyWise℠, along with possible energy efficiency financial incentives, contact your local utility.

Windows
window blinds


WINDOWS

Stay cool, and manage your costs, by first reducing the amount of infrared heat entering your home.

As Nebraska switches from heating to cooling season, we usually enjoy a few short weeks without continuously hearing our home’s HVAC system running. But it won’t be long until the rising mercury has our air conditioning systems buzzing.. Stay cool, and manage your costs for doing so, by first reducing the amount of infrared heat entering your home. When outdoor temperatures exceed your thermostat setting for cooling, energy savings from the sun’s “free lighting” is rapidly offset by air conditioning costs. How can you regulate this unwanted heat?

Shades

When properly installed, window shades can be a simple and effective way to save energy. Shades should be mounted as close to the glass as possible with the sides of the shade held close to the wall to establish a sealed air space.

Quilted roller shades, some types of Roman shades, and pleated shades feature several layers of material and sealed edges. These shades act as both insulation and a barrier to control air infiltration more effectively than other soft window treatments. For even more efficiency, use dual-sided shades that are reflective (white) on one side and heat absorbing (dark) on the other. These can be reversed with the seasons. The reflective surface should always face the warmest side — outward during the cooling season and inward during the heating season.

Blinds

Because of their operating slats, blinds offer flexibility in the summer. Unlike shades, you can adjust the slats to control light and ventilation. When completely closed and lowered on a sunny window, highly reflective blinds can reduce heat gain by around 45 percent. They can also be adjusted to block and reflect direct sunlight onto a light-colored ceiling to provide additional lighting.

Drapery

A drapery’s ability to reduce heat loss and gain depends on several factors, including fabric type (closed or open weave) and color. With such a wide variety of drapery available, it is difficult to generalize their energy performance.

During summer days, you should close drapery on windows receiving direct sunlight to prevent heat gain. Studies demonstrate medium-colored drapery with white, plastic backings can reduce heat gains by 33 percent. To reduce heat exchange between the glass and window treatments, drapery should be hung as close to windows as possible.

High-Reflectivity Films

High-reflectivity window films help block summer heat gain. They are best used in climates with long cooling seasons because they also block winter thermal heat. Silver, mirror-like films typically are more effective as a heat gain deterrent than colored, more transparent films. Covering east- and west-facing windows can produce the greatest benefit.

Note that window films do have some disadvantages, too. They can significantly reduce the level of interior light or visible transmittance. They may also impair outside visibility. Some films require extra care when cleaning, and exterior reflections could pose a problem.

Mesh Window Screens

Mesh window screens can diffuse solar radiation, reducing summertime heat gain. Screens should be mounted in an exterior frame and should cover entire windows. They are particularly effective on east- and west-facing windows.

Overhangs

Properly sized and installed roof overhangs can most effectively shade south-facing windows from summer heat. If oriented properly, overhangs will allow sunlight in through the windows during winter, providing more warmth to a house.

It is easy to incorporate overhangs into a home design before or while it’s under construction. Adding an overhang to an existing home, however, can be quite difficult and sometimes impossible. Window awnings, louvered patio covers, or lattice-type panels can be considered as alternatives for existing homes.

Shutters

Both interior and exterior shutters, can help reduce summertime heat gain in your home. Remember that interior shutters need a clear space to the side of the window when opened. They also require hardware fastened to the window jams or trim. Properly designed exterior shutters may provide the best possible window insulation system. They also offer advantages of weather protection, added security, and no use of interior space.

Awnings

With their recent rise in popularity, the U.S. Department of Energy calculates window awnings can reduce solar heat gain in the summer by up to 65 percent on south-facing windows and 77 percent on west-facing windows. Today, awnings are made from synthetic fabrics that are water-repellent and treated to resist mildew and fading. You should choose one that is opaque and tightly woven. And be aware that a light-colored awning will reflect more sunlight than a darker awning.

Your local public power utility wants to help you make the most of the energy they provide you. That includes keeping your home cool this summer. For more ideas on how you can make your home EnergyWise℠, contact your local utility.

Corner Pivot Systems
Corner Pivot System


CORNER PIVOT SYSTEMS

Not aliens. Not crop circles. It’s farmers and center pivots. Welcome to Nebraska!

During the summer of 1989, I was coming home on a commercial jet from a business trip to Los Angeles.  As we were descending a few minutes outside of Lincoln, I remember overhearing a teenager seated in front of me exclaiming, “Wow, mom! Do you think aliens made all those crop circles down there?”

I smiled broadly and thought, “Nope! Not aliens. Not crop circles. It’s farmers and center pivots. Welcome to Nebraska!”

In 2016, Nebraska had over 9.3 million irrigated acres. About 80% of those irrigated acres use center pivots as their water delivery system. Since being invented by Frank Zybach in 1940, an estimated 78,000 systems are in use across the state.  Of those, about 53% are supplied water by an electric-driven pump.

While not always the case, the majority of pivots operate on a quarter-section of land (160 acres) that is square (1/2 mile wide x 1/2 mile long). By locating the starting point of a standard ¼-mile long pivot in the center of the field, a full circular rotation of the system irrigates approximately 125 to 141 acres depending whether an end gun is used. This leaves 19 to 35 acres in the corners not watered.

By 1970, pivot manufacturers were producing corner pivot systems that have a special arm to swing out when approaching corners and then tuck back in when approaching the center of field edges. Compared to the standard pivot operating on a quarter-section of land, an additional 14 to 31 acres can be irrigated. Most existing systems have a buried, low-voltage wire around the outside of the field and a radio receiver on the corner arm to follow and direct the steering system. Recently, some newer guidance systems take advantage of a global positioning system (GPS) to direct the corner arm,thus eliminating the need for a buried guide wire.

When the corner arm is fully operational, water flow requirements increase about 40% as the system delivers greater volume over a greater distance. Pumping systems, including the size of the electric motor,are designed to account for this increase in flow. However, this maximum flow is only needed about 20% of the operating time. To adjust, pressure and flow regulators reduce output to match water delivery. Unfortunately, the pump motor continues to operate at 100% output and wastes energy 80% of the time.

If the pump motor is compatible, this energy waste can be reduced by installing a variable frequency drive (VFD). VFDs vary the frequency and voltage of electricity supplied to the pump motor based on the changing flow requirements, thus eliminating most of the “overpumping”. In a report published through the University of Nebraska last year, CONSERVATION OF ENERGY USING VARIABLE FREQUENCY DRIVE FOR CENTER PIVOT IRRIGATION SYSTEMS IN NEBRASKA (Dilshad Brar, M.S.University of Nebraska, 2015), data reveals that energy efficiency savings of 20 to 30 percent are achieved for center pivot corner systems when paired with VFDs.

To find out more about whether a VFD can bring energy savings to your irrigation, contact your local electric utility. You may even find you are eligible for EnergyWise℠  incentives to help with the cost of installing a VFD on your corner pivot system.

Indoor Air Quality
Furnace Filter


INDOOR AIR QUALITY

As we improve the energy efficiency of existing homes and businesses we often create indoor air quality (IAQ) concerns.

During Nebraska winters, most of the energy used in homes and businesses keeps the interior warm. As we improve the energy efficiency of existing homes and businesses by adding insulation, sealing up air leakage or implementing ways to reduce heating to where and when needed, we often create indoor air quality (IAQ) concerns. At the same time, more new homes are constructed with nearly-air tight building envelopes that create their own air issues if not managed.

Major IAQ issues in our state include:  

  • Radon
  • Carbon Monoxide
  • Biologicals & Airborne illnesses
  • Volatile Organic Compounds
  • Particulates

Often, IAQ solutions can be costly when considering the purchase, installation and ongoing energy use. While some solutions require increased energy use, others provide savings after small to medium-cost improvements. Some are as simple and inexpensive as changing your heating system’s air filter or caulking around areas where outside air is infiltrating.Others may require optimizing or replacing your current heating system. Chances are, all IAQ solutions will impact ongoing heating and/or air-conditioning costs.

Usually, long term solutions are better than quick remedies for IAQ problems. Before weighing costly improvements and intensive efforts to improve indoor air quality, reduce heating costs or to achieve “incredible” energy savings, contact your local electric utility. They can provide unbiased perspectives on many efficiency opportunities. In addition, you may find you are eligible for EnergyWise℠ incentives to help with the cost of energy-saving improvements.

LED Lights
LED Christmas Lights


LED LIGHTS

When considering switching to LED lights, do some homework

If you’re still using incandescent Christmas lights for your holiday decorating, I assume you have your reasons. I have mine. For me,it’s the nostalgia of Christmases past. So, when I considered switching to LED lights, I did some homework. For those still on the fence, I share some arguments and insight below.

First, I’ve heard the “stranded” investment rational. “I’ve got too much invested in all my lights!” “If they’re not broke, why would you pitch ‘em?” These sound like two contentions I’m sure my grandpa would make if I could ask his opinion on upgrading to LEDs.  Unfortunately, these perspectives don’t account for operating and maintaining those lights into the future.

Truth be told, both incandescent and LED lights will eventually need replacement. Though some may boast their Christmas lights are decades old, most light strands fail long before reaching such an age. While traditional lights have ratings 3,000 hours of use or less, some LED Christmas lights boast a 50,000-hour lifetime. Though light sets used indoors will last much longer than outdoor sets, don’t expect anywhere close to 50,000 hours. According to Christmas designers.com, a company with more than 30 years of experience building and installing Christmas decorations and lighting, exterior LED and traditional incandescent light sets have about the same lifespan.Professional and commercial grade sets will last six to seven years if stored away after Christmas. If left up throughout the year, they will only last 24 to 30 months. Average retail grade sets, which most homeowners buy, will last about three years when taken out of storage and displayed only during the holiday season. If left up year-round, retail grade sets are fortunate to last six to 12 months.

Second, I’ve heard cost per strand makes LED sun affordable. Let’s do some simple math. Assume my Christmas lights operate 12 hours-per-day for 30 days of the season. That’s a total of 360 hours-a-year.Currently, a 100-bulb strand of traditional incandescent mini-lights costs about $3 and requires 40 watts of electricity, while a 100-bulb strand of LED mini-lights costs from $6 to $12 and only requires six watts. If electricity costs $0.12 per kilowatt-hour, the traditional incandescent mini-light sets each cost about $1.73 to operate, while LED mini-light sets only cost $0.26. Energy savings pay for the new LED mini-lights in four to eight years. Not bad.

When I look at the large C9 lights for exterior lighting,a strand of 25 traditional incandescent lights will cost about $12 to purchase and $9.72 per season to operate. A new set of 25 LED C9 lights will only cost$5 to $10 per 25 lamps. More importantly, electricity to operate them will only cost $0.09 per season! In other words, energy savings gained by upgrading to LED C9 lights will pay for each new LED replacement strand in about one season or less.

Others have complained LED Christmas lights are not as bright as incandescents. While this may be true when comparing individual bulbs, LEDs produce 10 times or more light than incandescent bulbs given the same amount of electricity. Moreover, multi-color LEDs tend to be more vibrant than incandescent Christmas lights, and they are available in many colors other than the traditional red, orange, yellow, green and blue. Even when selecting white lights, LEDs provide a choice of warm or cool white tones.

The most unusual rationalization I’ve heard for not upgrading to LED Christmas lights is safety. The person arguing this opinion pointed out some LEDs contain lead and other heavy metals which are toxic to humans. After listening to them, I pointed out most Christmas light manufacturers use lead in PVC insulation that insulates Christmas light wiring regardless of the lighting technology, albeit in trace amounts. That being said, LEDs and traditional incandescent Christmas lights are currently not considered toxic by law and can be disposed of in regular landfills.

If anything, LEDs provide greater safety than incandescent Christmas lights. Because of the heat they generate, incandescent bulbs must be made from glass, which can break and easily cut someone mishandling them. LEDs use plastic, which reduces accidental cutting hazards.As incandescent bulbs become hot, they can also become a fire hazard if operated too close to flammable substances. To the contrary, LEDs remain cool enough to touch even after hours of operation. The high operating temperature of incandescent lights is a direct result of the inefficient conversion of electricity to light. Consequently, incandescent Christmas lights can easily overload electrical circuits and must carry warnings and advise no more than five strands per circuit. By comparison, some LED sets state you can connect up to 50 strings without concern.

That brings me to my final justification for using incandescent Christmas lights: nostalgia. They bring back memories of being three years-old, then four the following year. I traveled with my parents for what seemed like hours as we made our way to grandpa and grandma’s farm for the holidays. As we drove into the evening and came to the last mile, our car would crest the final hill. At that point, I would be overwhelmed at the glowing incandescent splendor of grandpa’s luminary creations. Though still so faraway, their brilliance cut through the night and made promise of the food,family and fun to be shared over the next few days. Their warm radiance assured security and love.

But today, as I approach grandpa’s age of when those magic memories occurred, I’m realizing it’s not that I want to go back in time to grandpa and grandma’s. Instead, I’m hoping my children, and someday,grandchildren, will have many of the same feelings I had when they come back for the holidays. As they gaze on our beautifully-illuminated home, it won’t be the lighting technology that creates those sentimental memories they will cherish for years to come. Rather, it will be the special time we share together at this most-special time of year.

Looks like I need to go to a hardware store and get some LED Christmas lights. Merry Christmas.

Your local public power utility wishes you and those closest to you the best of holiday seasons.

Garage Heating
garage door


GARAGE HEATING

As cold weather sets its grip on our daily lives, many people retreat to their garage to escape the outdoor elements.

Cars are parked inside to avoid scraping off ice and snow in the morning. Projects are moved in to evade the chilling wind. Closing up the doors and windows, many start using supplemental heat to make their garage even more hospitable. Wood stoves are stoked. Space heaters are plugged in. Thermostats for shop furnaces are turned up. Unless folks remember how these actions affected their energy use last year, they may be shocked when their first winter utility bills arrive.

Usually the garage is the most energy inefficient room of a home. A typical two-car garage measures 480 square feet, or about 20 percent of the size of the average U.S. home. Yet, it is often the least insulated and sealed, and it uses the least efficient lighting and is home to older appliances. Before taking up temporary residency in your garage this winter and cranking up the heat, consider a few of the following projects to keep your energy use from literally going through the roof.

‍Insulate the walls

Many older homes (and even some newer ones) were not built with insulation in the walls of the garage.While most have outside siding, sheathing and a layer of particle board to keep elements out, these materials do little to retain heat. Insulating can be as easy as tacking fiberglass insulation between exposed joists. If your garage walls are finished, insulation can be blown in through a small hole in the drywall or paneling.

‍Caulk between the walls and the concrete floor

Most garages were not built using compressible foam between the lower framing and concrete floor.What happens is over time, this connection swells, shrinks and moves, leaving spaces which will allow air from the outside to leak in. You can either use a foam sealant or a latex/silicone-based caulk to seal this often overlooked area.

‍Seal the door between the house and garage

If your garage is attached to the house, this door is often a major source of cold air coming into your home. If your garage is detached, it may be letting much of your garage heat escape. Check to ensure weather-stripping is installed around the entire door frame, and that it’s intact, pliable and provides a snug seal. Also, ensure your threshold and door sweep are sealing the bottom.

‍Insulate the garage door

Even some garages with properly-insulated walls were constructed with an uninsulated garage door. This negates much of the benefit from insulated walls. A new, insulated door will cost several hundreds of dollars or more, but will provide a clean appearance.A lower cost solution is to purchase foam board insulation and install it on the inside panels of your existing doors. Remember, you must cut the foam board to a size a little smaller than your garage door’s panels so it doesn’t smash together with insulation on other panels as the door rolls up and down.

‍Switch to LED lighting

Compared to traditional,incandescent lights, LEDs use only 10 percent of the electricity to produce identical illumination levels. Compared to fluorescent lighting, LEDs use 40 to 60 percent less energy for the same amount of light. More importantly,fluorescent lights produce less and less light as the temperature drops. Many fluorescent lights will not even operate below 10°F. In contrast, LEDs slightly increase their light output the colder it gets.

‍Replace older appliances

If you have an older model refrigerator or freezer in your garage, it may cost more money for you to operate it over time than it would to invest into a new unit. Although the energy savings are smaller in the winter, consider how hot your garage becomes in the summer. Some people move their old televisions to the garage, too. Older televisions can use up to 10 times more energy than newer models. If you use these older appliances quite a bit, consider purchasing a new ENERGY STAR appliance. If you are not ready to replace the old one, at least unplug it when  not in use to save electricity.

For additional ideas on how you can reduce the cost of heating your garage this winter, contact your local electric utility. You may even find you are eligible for EnergyWise℠ incentives for helping with the cost of other energy-saving home improvements.

Cooking Efficiency
pan on stove


COOKING EFFICIENCY

Average households use about three percent of their annual energy for cooking

The U.S. Department of Energy states average households use about three percent of their annual energy for cooking. While that sounds like a minor amount, note we also use more than seven percent for refrigeration,about one percent for dishwashing, one percent for lighting the kitchen and one-quarter of a percent for food preparation. Combined, that adds up to one-eighth of the total energy we use in our homes!

For those of you who consider yourselves expert culinarians, the following tips may seem rudimentary. But, for those who use the smoke alarm as a kitchen timer or declare a cooking success when you get the pop tart to the table in one piece.

Seasoned chefs know the secret to excellent cooking is applying the right type of heat, in the right manner, amount and length of time. Most often, this is also the secret to optimizing your cooking energy efficiency.Though cooking equipment provides you countless options, how you use it may save you the most energy and money.

‍First, consider what you are cooking and which appliance you’ll use to cook it to perfection. Meatloaf?Use a small oven that minimizes the area that must be heated for an hour or more. Soups and stews? Since they require long cooking periods, a crockpot will save a substantial amount of electricity, as it maintains a low-temperature heat over a long period of time.

Remember, full-sized ovens are not very efficient when cooking small quantities of food. If you are frequently only cooking for one or two, consider investing in a toaster oven. Similarly, when using the range or cooktop, select the smallest pan necessary to do the job. Select a burner with a diameter as close to the bottom of the pan’s as possible. A six-inch pan on an eight-inch burner wastes more than 40 percent of heat produced.  

‍Second, consider your cookware choices. Most people aren’t interested in spending hundreds of dollars on pots and pans. However, higher-quality cookware offers energy efficiency benefits and better control over the quality of food you ultimately put on your plate.

Now, think about skillets used on the stovetop. The best skillets and frying pans have slightly concave bottoms that, when heated,expand and flatten out. The same applies to pots and kettles. Direct contact with the face of the burner optimizes the transfer of heat. In contrast, a warped-bottomed pot can be used for boiling pasta water, but it may use 50 percent more energy to get your noodles to “al dente” than a flat-bottomed pot.

Using appropriate cookware can also result in more evenly-cooked food. Copper-bottomed pans heat up faster than regular pans and are excellent for frying. In the oven, glass or ceramic pans typically provide“browning” more quickly than metal. Often, you can turn down the temperature 25°F using glass and ceramic pans and cook foods just as quickly.

‍Third, keep your cooking equipment in top shape. On the stove top or range, metal pans under the burners that catch spills can become blackened from heavy use. As they do,they absorb a lot of heat, which reduces burner efficiency. The same can be said for microwaves. Food particles from previous meals can absorb energy intended for your current recipe and “bake on” over time, making cleaning more difficult later.

‍Fourth, consider food prep prior to adding heat. Defrost frozen foods in the refrigerator or microwave before cooking so your oven or stovetop doesn’t have to thaw food before cooking it. The closer you can start food to the temperature where you will finish cooking usually provides better quality in addition to reduced cooking times and efficiency.

Do you really need to preheat an oven? Try to keep preheat times to a minimum. Don’t set it and forget it! In fact, unless you’re baking breads or pastries, you probably do not need to preheat the oven at all.Oven broilers achieve high temperatures in a matter of minutes and provide intense heat requiring high energy input. When it achieves the necessary temperature, stick the pan in!

Inside the oven, remember foods will cook more quickly and efficiently if air can circulate freely. Don’t lay foil on racks. If possible, stagger pans on upper and lower racks to improve airflow. Avoid peeking into the oven as you cook, as each time you open the door, a significant amount of heat escapes. Use your oven light and inspect through the oven door’s window, instead.

Finally, remember it takes much less energy to reheat food as it does to cook it. Consider cooking double portions and refrigerate or freeze half for another meal. The microwave can often provide a piping hot meal with a tiny fraction of the energy needed to make the meal in the first place.

For additional ideas on how you can save energy while taking on daily life at home, contact your local electric utility. You may even find you are eligible for EnergyWise℠ incentives to help with the cost of energy-saving home improvements.

‍

Ceiling
Ceiling Light


CEILING

Without realizing it, you could be losing more than 30 percent of the heat in your home through the ceiling

If you’re not there already, go to the top floor of your home and look up. What do you see? A drywall ceiling? HVAC ducts? Light fixtures? An attic access door? If your home is like most, an unconditioned attic is on the other side of that ceiling. Ask yourself this question: This January, what will the temperature be like up there? Without realizing it, you could be losing more than 30 percent of the heat in your home through your ceiling!

When looking for ways to make improvements, first consider light fixtures, and in particular, recessed “can” lights. Can lights, especially those manufactured before 2004, have plenty of holes and gaps to allow conditioned air from the living space to escape into the attic. Because these fixtures traditionally use hot, incandescent bulbs and protrude up, they should not be covered with insulation without first installing a cover with an airtight barrier. While you may choose to make covers yourself out of sheet metal or lumber, most home improvement stores offer air-tight can light covers made of a fire-retardant material that are designed specifically for this purpose. Once the cover is ready for installation, apply spray foam insulation to seal air leakages and secure it in place. Ceiling penetrations for other light fixtures or ceiling fans may also leak air from your conditioned space and should be sealed in a similar manner.

If you saw a register, grille or air diffuser when looking up, you have ductwork running through your attic. Is it insulated? Uninsulated ductwork running through unconditioned spaces can lose as much as 40 percent of a heating or cooling system’s energy. Special insulation designed for ductwork with at least an R-6 insulative rating and a vapor barrier is also available at home improvement stores.

If you have air conditioning, properly insulated ducts are necessary for more than energy efficiency. During the summer, cool air passing through metal ducts in warm attics can cause condensation on ductwork, and dripping will occur. This can lead to mold growth and safety issues. Uninsulated ducts are also at risk of becoming rusted and leaking conditioned air.

How about an attic access door or panel? If you have stairs or a ladder mounted above, install a molded insulation cover above the access door. If you have a simple door or panel, you can easily insulate yourself with rigid-foam insulation panels and construction adhesive. Finally, install weather stripping to reduce air leakage around the perimeter of the door or hatch.

Now, for the big one. Consider your attic insulation. Due to temperature, compression, aging and moisture accumulation, some insulations lose their R-value over time. The Department of Energy recommends Nebraska homes have an R38 insulation value or better. Insulation batts and blankets are made of fiberglass or mineral wool and are most commonly used in unconfined areas, like unfinished attics, roofs and underfloors. Batts and blankets often have an R-value of 2.9 to 4.0 per inch of thickness. Blown-in / loose-fill insulation is commonly made of cellulose, glass fiber, mineral wool, perlite or vermiculite. It can be easily blown or spread into areas needing more insulation. Loose-fill insulation usually has an R-value of 2.2 to 3.8 per inch of thickness. If you don’t have at least one foot of either of these insulation types, you probably have an energy efficiency improvement opportunity.

Note that reflective insulation or radiant barriers are sometimes installed in attics to reduce summer heat gain and reduce cooling costs. Barriers consist of a highly-reflective material that redirects radiant heat away from the living space rather than absorbing it. Unfortunately, the same effect occurs in winter when radiant heat is beneficial. Since Nebraska has a heating-dominated climate versus a cooling-dominated climate, the summertime benefit is often negated by increased energy use in colder months. Some representatives of radiant barrier material claim their product will provide an equivalent of thermal insulation with an R-value of 25 or higher. These claims are not substantiated because these products by themselves do very little to reduce heat conduction like thermal insulation materials.

If your attic has six inches or less of insulation and you use primarily electricity to heat it, there is an EnergyWise℠ program to help if you want to add an R-value of at least 19 or six inches of blown-in insulation. By participating in the Residential Attic Insulation Program, customers are eligible for an incentive of $0.15 per square foot of insulation with a maximum incentive amount of $300 per existing residential dwelling. New construction and/or additions do not qualify.

Your local public power utility wants to help you make the most of your home energy use. For more ideas on how you can make your home or business EnergyWise℠, along with possible energy efficiency financial incentives for a variety of improvements, contact your local utility.

‍

Summer Energy Use
sun


SUMMER ENERGY USE

Why does your electric bill seem to shoot up during the summer?

Some people question whether their electric meter is registering correctly. Most blame air-conditioning as the culprit. While cooling usually consumes the largest portion of home energy bills during hot months, there is another reason why you must reach deeper into your pocket to pay summer electric bills.

To support high electricity usage on very hot days, your electric utility often requires supplemental electricity from additional generating facilities. For most utilities in the U.S.,
these peak periods occur weekdays, between 3 p.m. and 8 p.m. Sometimes “peaker” plants, which run on natural gas and usually do not operate 97 to 99 percent of the year, can be switched on quickly to satisfy periods of peak power demand. Other times, less-efficient fuel oil and coal plants are added to the generation mix to meet increased electrical needs.

Estimates show that 10 to 20 percent of the overall annual cost of providing electricity comes from supplying electrical demand during the 100 most-expensive hours of the year. In Nebraska these “peaks” usually occur during the summer; therefore, most Nebraska utilities bill their customers using a summer rate. Some utilities begin their summer rate period as early as May 15 and run as late as October 15. In general, summer rates are often designed 25 to 35 percent higher than winter rates to cover additional peaking power costs.

Is there anything you can do to reduce the cost of your summer electrical use? Absolutely! Consider this: the wholesale purchase price your utility must pay for the electricity
you use is significantly impacted by what time of day you are using it. If you use it most during the peak period, your utility will pay more for additional energy resources needed.  But if you can reduce or shift your usage to another time of day, your utility will pay less. That reduces the need for future rate increases to you.

Here are easy ways for you to help your electric utility and reduce your “peak” energy use:

  • Shift as much of your energy use as you can to before noon or after 9 p.m.
  • Your microwave uses about two-thirds less energy than your stove. Better yet, grill outside.
  • Most dishwashers use less water and energy than washing dishes by hand. Use the air-dry setting on your dishwasher to save even more.
  • Fill your refrigerator. Filling your fridge with lots of food and beverages will keep it from warming up quickly when the door is open – causing it to run for a long
    time after the door is closed. Just remember to leave sufficient room around items so chilled air can properly circulate.
  • Set your air conditioning thermostat to 78°F when you are home, and 85°F, or off, when you are away. Using ceiling or room fans allows you to set the thermostat higher
    because air movement will make the room feel cooler. When you leave the room, don’t forget to turn the fan off.
  • Do your laundry by using the cold water setting on your washer. Line-dry clothes whenever you can.
  • When you need to use the clothes dryer, run full loads, use the moisture-sensing setting, and clean the lint trap after each use.
  • Unplug electronic devices and chargers when they are not in use. Turn computers and printers off at the power strip.
  • Unplug and recycle that spare refrigerator in the garage if you don’t really need it.
  • Replace dirty air conditioner filters. Plugged filters restrict airflow and can cause the system to run longer.
  • Install and use window shading inside to reduce heat gain while the sun is shining.
  • Install patio covers and awnings, and plant trees where appropriate to shade your home.
  • Have a cooling system tune-up completed on your HVAC system to reduce energy needed for air-conditioning.
  • Replace your standard electric hot water heater with a heat pump water heater that provides cooling while heating your water.

We want to help you make the most of your energy dollars this summer while keeping you cool.

Window Air Conditioners
Window Air Conditioner


WINDOW AIR CONDITIONERS

When summer pours on the heat, you want to be cool.

For many reasons, people often turn to a window air conditioner. While window A/C units can offer many advantages over other options, they present their own challenges and drawbacks. If you are considering a window A/C so you can “chill out” this summer, take a few minutes to weigh the following points.

Let’s start with advantages. First, the upfront cost is significantly less than adding a central air conditioning system to your home. Small units that cool a room start at a little more than $100, while units large enough to serve an entire 1,400-square-foot house are often priced below $850. Second, they are easy to install. Most purchasers can mount their unit themselves without too many complications. Third, they can be installed in many places. If your place has transom, single- or double- hung windows, most can find a suitable place to install. Fourth, if operated to provide cooling only where needed, room air conditioners can be less expensive to operate than central units. Lastly, they provide a temporary, transferable cooling solution, which is ideal for renters who may move frequently or have a landlord who is not interested in investing in a more expensive solution.

Now consider disadvantages. First, not all windows support air conditioners. Fixed, glider and casement windows do not accommodate window A/Cs. Second, the overall efficiency of the air conditioning process is usually less than other air conditioning options. That is why it is important to purchase a unit with ENERGY STAR® recognition. Third, remember the window where you install the air conditioner is not functional once the unit is installed. Your outside view will be blocked, and the window cannot be opened to let in fresh air. Fourth, window A/Cs usually require exterior support. Sadly, stories of units falling out windows, even during installation, are common. Fifth, the installation panels that come with the unit can let in a lot of hot air, which is opposite of what you want. Sixth, water dripping from the exterior can end up in unwanted places, such as on a pathway or vehicle. As air conditioners cool, they also dehumidify indoor air, and that water must go somewhere. Finally, even the best installation may still leave your home or apartment with a security risk.

If you decide a window air conditioner is your best choice for cooling, start by doing some homework. Begin by determining which room or rooms and how much area you are trying to cool. Buying the biggest air conditioner you can find will not necessarily make you feel more comfortable. Air conditioners that are too big for the area they are supposed to cool will perform less efficiently and effectively than a smaller, properly-sized unit. That is because an oversized unit will cool the area to the thermostat set-point before adequate dehumidification occurs, leaving occupants feeling clammy and uncomfortable.

Window air conditioners are sized by the number of British thermal units (Btus) they remove from your living space over a one-hour period. Units range from 5,000 to 28,000 Btus in size. To estimate the size you’d need, a general rule-of-thumb is that units need 20 Btu of capacity for each square foot of living space being cooled. Another important factor to consider when selecting a unit is room height. Ceilings higher or lower than eight feet can proportionately change your calculation. Consider where direct sunlight will be during the hottest part of the day, as well. If your unit’s exterior is not shaded, it will have to run longer to compensate for the additional heat.

Since air conditioners run on electricity, consider where you will plug the unit into. Smaller room air conditioners (10,000 Btu and under) may be plugged into any 15- or 20-amp circuit if it is not shared with any other major appliances. Larger units (12,000 to 15,000 Btus) require their own, dedicated 115-volt circuit. The largest models (18,000 Btu and larger) require a dedicated 208/230-volt circuit.

To optimize the effectiveness and efficiency of your unit, consider a few more things. When installing, be sure the unit is leveled as per installation instructions so drainage occurs appropriately. Be sure the unit is adequately supported on the exterior. Larger units are especially heavy and require additional support. You do not want to experience that horrible feeling that occurs as you watch your new unit smash on the sidewalk below. At that point, there is no way to cool you down! Also, seal all gaps between the perimeter of the unit and the window to keep hot, humid air outside.

In addition, do not place lamps or televisions near the air conditioner’s thermostat. Sensing heat from these appliances, the air conditioner will run longer than necessary. Set the thermostat as high as comfortably possible. Using fans in conjunction with the A/C will help distribute cooled air more evenly while providing comfort at higher temperature setpoints and saving energy.

When you turn on your air conditioner, do not turn your thermostat setting down lower than your normal temperature setting. The colder thermostat setting will not cool your home any faster and could result in excessive cooling and unnecessary expense. Set the fan speed on high, except on very humid days. When humidity is high, set the fan speed on low for more comfort, which will remove more moisture from the air because of slower air movement through the air conditioner’s coils.

Finally, remember all air conditioners CONSUME ELECTRICITY! In general, the larger the unit, the more it will use. Sadly, some do not realize how much until they receive their electric bill – sometimes after more than a month of use. If a person averages $0.12/kWh for summer electrical costs, the following is an estimate of what it will cost to operate a window air conditioner at full load for eight hours each day over a 30-day period, based on the unit’s size:

  • 6,000 Btu         –           $14.40
  • 9,000 Btu         –           $21.60
  • 12,000 Btu       –           $28.80
  • 15,000 Btu       –           $36.00
  • 18,000 Btu       –           $43.20
  • 24,000 Btu       –           $57.60

Your local public power utility wants to help you keep cool this summer! This includes helping you manage the energy needed to do so. For more ideas on how you can make your home or business EnergyWise℠, as well as financial incentives to help with the cost of your energy-saving upgrades, contact your local utility.

Cooling System Tune-Up
Air Conditioner Fan


COOLING SYSTEM TUNE-UP

When is the worst time for your air conditioning system to fail?

While there is no statistical evidence supporting my opinion, I would say 5:01 p.m. on a Friday, when outdoor temperatures are soaring greater than 95 degrees and clear skies are forecasted all weekend long. At that time, you are faced with a choice: Do you call a heating, ventilation and air conditioning (HVAC) contractor and pay overtime and additional charges to be cool, or do you suffer through the never-ending weekend to get next week’s standard rates after being placed on a waiting list for the next available technician?

I have another idea. How about minimizing chances you will ever be in this position? Has your air conditioning system had a cooling system tune-up in the last three years? Maybe you’re wondering what a cooling system tune-up even is!

If it has been of few years, now is the time to have your HVAC contractor inspect, service and clean it. Typically, tune-ups on cooling systems that have been neglected can provide 5 to 15 percent energy savings or more. Not to mention your unit can better perform from a comfort and equipment longevity standpoint. At a minimum, a tune-up should include the following:

Clean Condenser Coil – Outdoor condenser coils can become very dirty if outdoor environment is dusty or if there is foliage nearby. You can easily see the condenser coil and notice if dirt is collecting on its fins. These coils are also easily bent and can block airflow through the coil. An HVAC technician will use a tool called a “fin comb” to align fins into nearly original condition. The technician also has access to commercial-grade cleaning products to best remove dirt and other contaminants.

Check Refrigerant Charge – Performance and efficiency of your air conditioner is greatest when the refrigerant charge exactly matches the manufacturer’s specification. In the event your system is low, the HVAC technician will add just the right amount to optimize performance.

Clean Indoor Coil – Your indoor coil is inside your furnace or ductwork. Even though you may be faithful about changing out filters, dust, allergens and airborne particles can accumulate on its fins and dramatically reduce efficiency. Even worse, dirty coils can become a source for mold and other bacteria to thrive. If you think your cooling system runs longer than it used to, has reduced capacity or the evaporator coil is freezing up, it needs to be cleaned.

Check Belt / Lube Motor – Over time, belts crack and signal their impending failure. Some fan motors require occasional oiling to lubricate moving parts and reduce premature motor failure.

Blow Out Drain Line – Condensate drain lines are a continuous source of moisture during the cooling season. If water does not flow through the drain line properly, mold, mildew and fungus can develop and create a situation detrimental to your health. In addition, if mold, algae growth or other debris obstruct or block the condensate drain line, the condensate pan can become filled with water and eventually overflow.

 Perform Visual Inspection of System – To the HVAC technician’s trained eye, problems with your system you may consider as normal can be readily recognized and rectified.

Discuss Proper Operation – The HVAC technician can clarify whether that “sound” you might hear is normal. They can discuss proper control sequences to assure heating and cooling systems do not operate simultaneously, and also how to optimize operation for efficiency and comfort.

Discuss/Review Proper Temperature Set-Back – Not sure how to program your thermostat to automatically adjust your setting while you are away? The HVAC technician knows how!

Filter Service Schedule – In addition to discussing the quality and effectiveness of various filters, the technician can help identify how often you should be changing your filter. Some homes need to do this monthly, while others may get by with the same filter for six months or longer. According to the Department of Energy, replacing a dirty, clogged filter with a clean one can lower your air conditioner’s energy consumption by 5 to 15 percent.

Finally, check with your local electric utility to see if you are eligible for an EnergyWise℠ Cooling System Tune-Up incentive of $30. They also have additional ideas on other energy-saving improvements that can help you beat the red-hot summer heat while saving some cool green!

Seal Out The Cold
Caulking Door


SEAL OUT THE COLD

How well does your home seal out the cold?

When the thermometer dips below 20ºF and there is more than a little breeze outside, you can find out a lot about how well your home seals out the cold. You might notice your curtains lightly swaying with each pulse of wind. You might go downstairs into your basement and wonder why it feels 10 degrees colder than the main floor. Perhaps you wonder why the snow has already melted off your roof while your neighbor’s is still totally white. Worse yet, you might have opened your latest utility bill to find you used two or three times more energy than the prior month. All of these situations are often the result of one common problem: infiltration.

Infiltration is the unintentional or accidental introduction of outside air into a home, typically through cracks in the building envelope and through use of entryways. Some people refer to infiltration as air leakage. Infiltration can be caused by wind, negative pressurization of the home, and air buoyancy forces commonly known as the “stack effect.”

The “stack effect” is when warm air moves upward in a building. This happens in summer and winter, but is most pronounced in winter when indoor-outdoor temperature differences are greatest. Warm air rises because it is lighter than cold air. So when indoor air is warmer than outdoor air, it escapes from upper levels of a home and through open windows, ventilation openings or penetrations and cracks in the building envelope. Rising warm air reduces pressure in the base of the home, forcing cold air to infiltrate through open doors, windows or where the house sets on its foundation. In winter, this can result in warm, moist indoor air moving into cold envelope cavities. As that air cools, it condenses, creating unexpected water problems in unforeseen locations.

In most homes, about one-third of the energy used for space conditioning is due to infiltration. As such, reducing infiltration can yield significant energy savings, with rapid payback.

To gain an accurate estimation of how much infiltration your home is subject to, a blower door test can be conducted. What is a blower door? It is a powerful fan that attaches to an external doorway (typically the entrance to the home) and blows air into or out of the house to pressurize or depressurize the home. The house is depressurized to a pressure of 50 pascals less than outside, which is the equivalent of a steady 20 mile-per-hour wind blowing at all sides of the building. Once this pressure is achieved, the device measures airflow needed to produce this pressure, which of course is the same as the airflow leaking into the house through various cracks. The resulting value is measured in Air Changes per Hour, or ACH. This indicates how many times per hour the total volume of air inside a home is replaced by outside air due to infiltration.

The State of Nebraska currently requires new homes be built to meet the 2009 International Energy Conservation Code, which states air changes must be less than 7 ACH at 50 pascals. As Nebraska adopts newer versions of the code, that number will drop below 5 ACH.

If you live in an existing home, there are numerous things you can do to reduce infiltration. Here are a few:

  • Caulk and weather-strip doors and windows that leak air.
  • Caulk and seal air leaks where plumbing, ducting, or electrical wiring comes through walls, floors, ceilings, and soffits over cabinets.
  • Install foam gaskets behind outlet and switch plates on walls.  Inspect dirty spots in your insulation for air leaks and mold. Seal leaks with low-expansion spray foam made for this purpose, and install house flashing if needed.
  • Look for dirty spots on your ceiling paint and carpet, which may indicate air leaks at interior wall/ceiling joints and wall/floor joists, and caulk them.
  • Cover single-pane windows with storm windows or replace them with more efficient double-pane, low-emissivity windows.
  • Use foam sealant on larger gaps around windows, baseboards, and other places where air may leak out. The sill plate or perimeter where a house sets on a foundation is often a major source of infiltration in existing homes.
  • Ensure kitchen and clothes dryer exhaust ports on the outside of your home have flaps that seal when not in use.
  • Replace door bottoms and thresholds with ones that have pliable sealing gaskets.
  • Keep the fireplace flue damper tightly closed when not in use.
  • Seal air leaks around fireplace chimneys, furnaces, and gas-fired water heater vents with fire-resistant materials such as sheet metal, sheetrock and furnace cement caulk.

For additional ideas on how you can reduce the effects of infiltration and save energy while heating and cooling your home, contact your local electric utility. You may even find you are eligible for incentives for helping with the cost of other energy-saving home improvements.

Home Electronics
TV Remote


HOME ELECTRONICS

Our “plug-ins” consume more electricity each year!

Going through Grandma’s basement was like going through a museum and appreciating a simpler time. In the corner was a 1940s Zenith radio that hummed for 30 seconds when you plugged it in. Once it warmed up, you could adjust the amplitude and listen to at least one of five radio stations within 30 miles. Along another wall stood a 1960s Curtis Mathis console television that looked like a buffet table. Using a remote that ran on a nine-volt battery, you could turn it on and see the tubes in the back of the set glow and emit a black-and-white picture in the front. These were Grandma’s connections to the outside world. A little trickle of electricity was all she needed.

According to the World Bank, in 1966, the average American household used about 5,590 kilowatt-hours every year. As of 2013, that number shot up to about 12,985 kilowatt-hours annually. While it seems we still only need a little tickle of electricity to keep us connected today, our “plug-ins” consume much more electricity each year than Grandma’s radio and TV ever used in their lifetimes.

Today, the vast majority of home electronics energy use — up to 90 percent by some estimates — is consumed by home entertainment systems and home office equipment. The remaining 10 percent consists of many small energy users, including portable devices with battery chargers. Although each of these products uses a relatively small amount of electricity on an individual basis, they continue to proliferate rapidly and represent an opportunity to keep overall electronics energy use in check.

Did you know the Xbox 360 uses 187 watts of electricity? If you have active gamers in your home, this could add up to more than $100 a year to operate. But, wait! You have a television connected to the Xbox, too. Add another 20 to 100 percent to the first total, and you start to appreciate the cost of connectivity.

While the most energy-efficient HDTV costs around $30 a year to power, most power-hungry models can add more than $160 to the electric bill each year. Then, consider you probably have a computer, laptop and/or notepad. Any cell phones? Other remotes? Security systems? A lot of little devices that keep us connected add up to significant energy use.  Here are some ideas on how to manage them all: 

  • A cable box can draw 28 watts when it’s recording a show, and 26 watts when off. Even if the TV is never on, the box will consume more than 225 kilowatt-hours annually. That potentially translates to more than $25. Put your set (or entertainment center) on a power strip with a master switch if you don’t use it much. Power everything down until the next time you need it.
  • Unplug chargers and power supplies you typically leave plugged in. Leaving a laptop computer plugged in, even when it’s fully charged, can use 4.5 kilowatt-hours of electricity in a week, or about 235 kilowatt-hours a year.
  • Don’t use a gaming console to stream movies. They can use 45 times more power than streaming consoles, according to the Natural Resources Defense Council.
  • If your television ispre-2000, know that new set technology can be more than five times more efficient for the same size of screen. Many hours of use can add up!
  • Power down computers and office equipment at the end of the day. Contrary to what some think, powering electronics “up” and “down” does not impact the overall life of today’s electronics and does, indeed,save energy!
  • When shopping for new electronics, look for the ENERGY STAR label. This assures you are getting a minimum level of energy efficiency and quality.

For additional ideas on how you can save a little more with your electronics, contact your local electric utility. You may even find you are eligible for incentives for helping with the cost of other energy-saving home improvements.

Water Heating Costs
Shower Head


WATER HEATING COSTS

Take control of your water heating costs

If you have or have had teenagers in your household, you probably can relate to hopping into the shower at some point for a quick wash only to discover cold water pouring out regardless of where you adjust the faucet. Yes, that last person who doused themselves in a luxurious, steamy soaking for 30 minutes used up all the hot water! While you are standing there trying to towel the icicles off your shivering body, here are a couple of things that might get your blood boiling. First, it may take two hours or more for your 50-gallon electric hot water heater to fully recover. Second, that hot water recovery probably costs about one dollar each time it occurs. If this happens frequently in your home, it could be costing you some cash!

According to the U.S. Energy Information Administration, about 18 percent of all energy used in American homes goes toward heating water. It is second only to energy used to heat and cool your home. Fortunately, there are a few things you can do to take control of your water heating costs.

First, you might attempt to change the perception of certain “shower hogs” of what is a reasonable length of time for a shower. Through surveys, the U.S. Department of Energy has determined the average shower is eight minutes and consumes 10 gallons of hot water. Try setting a count-down timer to eight or less minutes to remind any “shower loiterers” how long they have been dawdling.

Another source of unnecessary hot water use relates to shower “warm-up” time. Nobody wants to stand under the cold stream of water initially spouting from the showerhead. Rather, the shower is turned on and unoccupied until heated water arrives. Sadly, many lose track of how long this waiting period is and allow hot water to flow long after the water is warmed and long before they get wet. To call attention to this common oversight, time how long it takes warm water to arrive at your showerhead after turning the hot water on. Then, use that same count-down timer described above to remind your household’s violator when the shower is ready to go!

Do you have a drippy showerhead that never quite shuts off because of the hot water valve? At one drip per second, you are losing more than five gallons of hot water each day. Over the course of one year, that equates to nearly 2,100 gallons. At a cost of 11 cents per kilowatt-hour, your electric hot water heater is adding an extra $43 a year to your power bill. Fix that drip!

Now, consider your showerhead. Since 1992, it has been federally mandated that showerheads sold in the U.S. have a maximum flow rate of 2.5 gallons-per-minute (GPM). Note, there is no minimum! Installing one that restricts flow to 2 GPM or less can provide savings of 20 percent or more!

Finally, investigate where your water heater is set. Most hot water heaters do not have calibrated thermostats that can be precisely set to produce a particular temperature. Rather, you will want to use a thermometer directly under the showerhead to measure output after the water has ran long enough to reach its maximum temperature. The U.S. Environmental Protection Agency recommends a setting that produces water no hotter than 120°F. This not only saves energy, it greatly reduces scalding risks.

To reduce the temperature, turn the thermostat to “cooler,” “lower” or a lower temperature reading. Wait at least four hours to allow the whole tank to be affected by the change. Then, measure the temperature again as described above. Remember that most electric water heaters have two thermostats! It may take several tries to get the temperature setting you desire. Regardless of where your current temperature is, for every 10ºF reduction, you can save from 3 to 5 percent on your water heating costs.

For additional ideas on how you can reduce your hot water costs, as well as where you might save additional energy in your home or business, contact your local electric utility. You may even find you are eligible for EnergyWise℠ efficiency incentives that help reduce the initial cost of other energy-saving home improvements.

Footer

en English
ar Arabiczh-CN Chinese (Simplified)nl Dutchen Englishfr Frenchde Germanit Italianpt Portugueseru Russianes Spanish

Copyright © 2021